The safety of building structures is not only related to people’s life and property but also has an important impact on a country’s economic development and social progress[1-8].With the increasing complexity of modern production processes, the scope of the application of engineering structures has gradually expanded, and various structure shapes have been developed for practical engineering applications.Whether these structures can safely serve as intended has become an important topic related to the national economy and people’s livelihood[2-3].Steel structures have been widely used in large stadiums, large-span structures, and high-rise and super-high-rise structures due to their lightweightness, high strength, and flexible shape.In the next few decades, the height and span are still the two main development directions of steel structures.This development trend will inevitably lead to a higher-level requirement for the design and manufacture of steel structures, especially for the connection parts of components.
Welded joints are made by cutting branch pipes into intersecting surfaces and then connected to main pipes through intersecting line welds[8-9].Cast steel joints are integrally cast in factories and connected to steel pipes using annular butt welds located far away from the core of the joints.Compared with traditional welded steel joints, cast steel joints have greater design freedom and more reasonable forces owing to the arc chamfering transitions at the intersection of pipes, and they are easier to process by using circular butt welding instead of intersecting line welding that is complicated in space and difficult to weld.Hence, the use of cast steel nodes is beneficial to the entire force of engineering structures.Therefore, cast steel joints are widely adopted in real-world structures[10-12].
Although cast steel nodes play an increasingly important role in modernization attributes because of their obvious advantages, due to the influence of alloy composition, casting process, casting shape, and other comprehensive factors during the casting process, casting defects, such as porosity, shrinkage porosity, slag inclusion, and cracks, are inevitably distributed inside the cast steel node[13].The existence of casting defects makes the overall structure remain in the elastic stage under the working load, but that near the defects will reach plasticity due to stress concentration, damage, and accumulate evolution.Studies have shown that major steel structure engineering accidents are mostly caused by a certain part of the steel fracture.Furthermore, cast steel components in engineering structures are often located in the key parts of the structures, so the internal defects of castings are very dangerous for the entire engineering structure[14-15].
The internal defects of steel castings are usually detected by ultrasonic and magnetic particle inspections before they leave factories.The quality grade of steel castings is evaluated according to the national standard GB/T 7233.1—2009[16].Nondestructive testing(NDT)is an effective technique to explore the internal casting defects of steel castings.However, the literature on the statistical analysis of NDT results of steel castings is rarely published.The lack of data in this aspect affects the research on the causes and distribution of casting defects and has restricted the further development and application of cast steel nodes.Accordingly, in this study, 24 cast steel joints produced by a steel casting factory were taken as samples, the casting defects in the joints were detected by the NDT method, and the random characteristics and distribution rules of casting defects among groups were studied.This work can provide references for the optimal design, production, and application of cast steel nodes.
1 Types and Causes of Casting Defects
The formation of casting defects in steel castings is related to the design, sand(including coating), melting, pouring, modeling, finishing, welding, and heat treatment of castings.In these processes, improper control or unreasonable process will result in casting defects.Some casting defects are caused by a combination of multiple reasons.The elimination and reduction of these defects often require a comprehensive treatment method.According to the national standard GB/T 5611—2017[17], casting defects are divided into eight categories, namely, metallic projections; pores; cracks; surface defects; incomplete defects; size, shape, and mass errors; inclusions; and unqualified properties, compositions, and microstructures, among which macroscopic defects are most common.The main defects related to the internal quality are pores, cracks, inclusions, and unqualified properties, compositions, and microstructures.The details of the characteristics of these typical defects can be seen in Refs[17-19].
2 NDT of Cast Steel Joints
Suppliers and demanders need to formulate corresponding NDT plans based on the structural shape of cast steel nodes and the characteristics of the production process.Three detection techniques, namely, visual inspection, magnetic particle inspection, and ultrasonic inspection, are performed before cast steel joints leave factories.Visual inspection is simple and convenient, and it is one of the most basic and commonly used inspection methods for the casting quality inspection of cast steel joints.It is necessary to polish the detection position smoothly to ensure the accuracy of detection results when using ultrasonic detection technology to detect cast steel nodes.However, as the ultrasonic NDT method requires a good coupling between the probe and tested object, there will be blind areas in ultrasonic scanning for complex cast steel nodes, such as the transition area between each branch pipe and the main pipe and chamfered area.For the blind area of ultrasonic flaw detection, the steel casting plant will use the magnetic particle nondestructive flaw detection method to detect defects on the surface or near the surface before the ultrasonic NDT of steel castings.
2.1 Test specimen
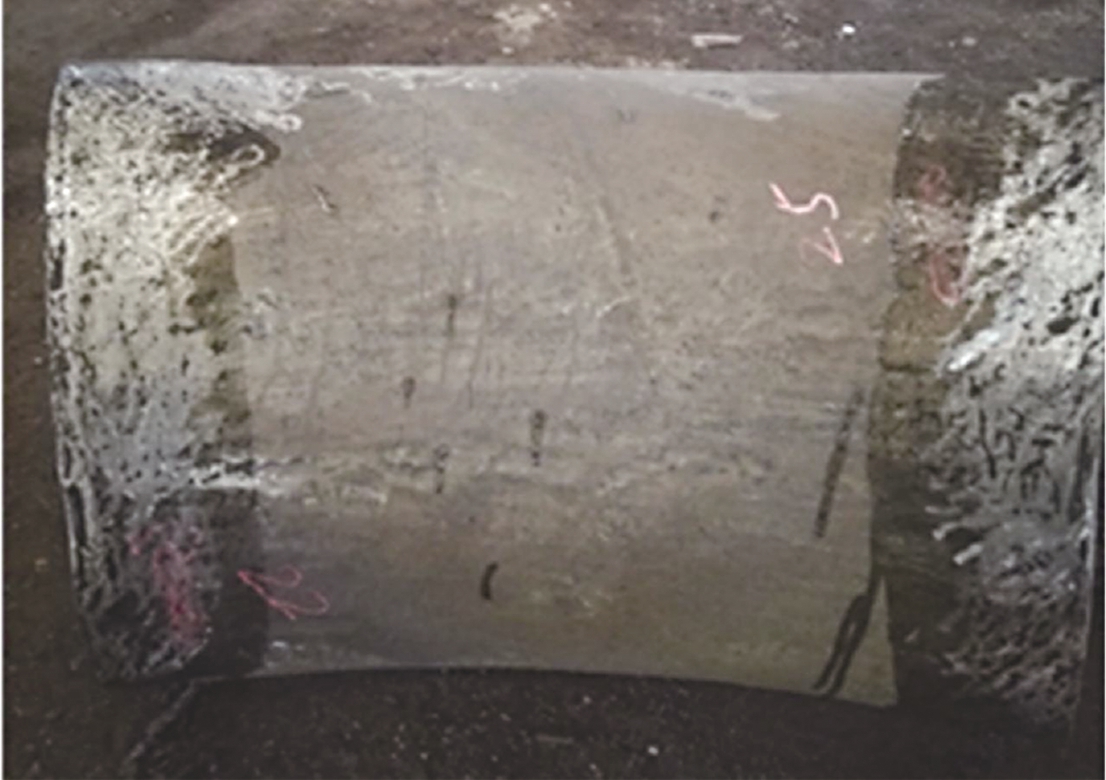
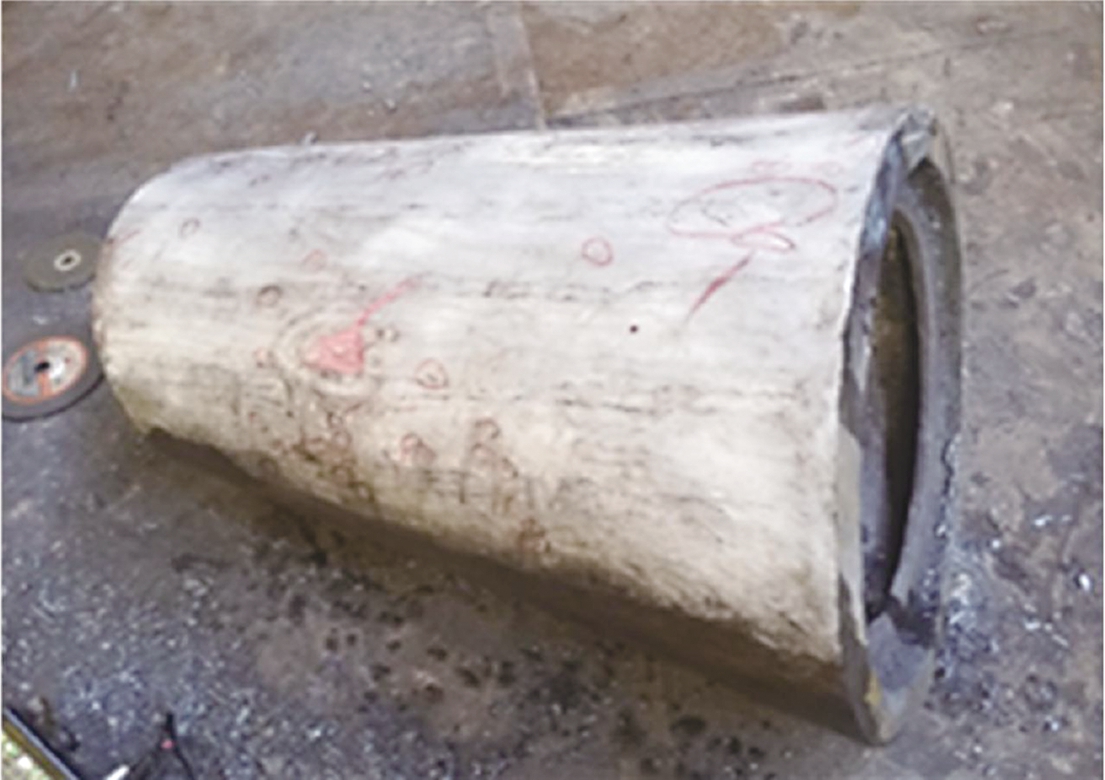
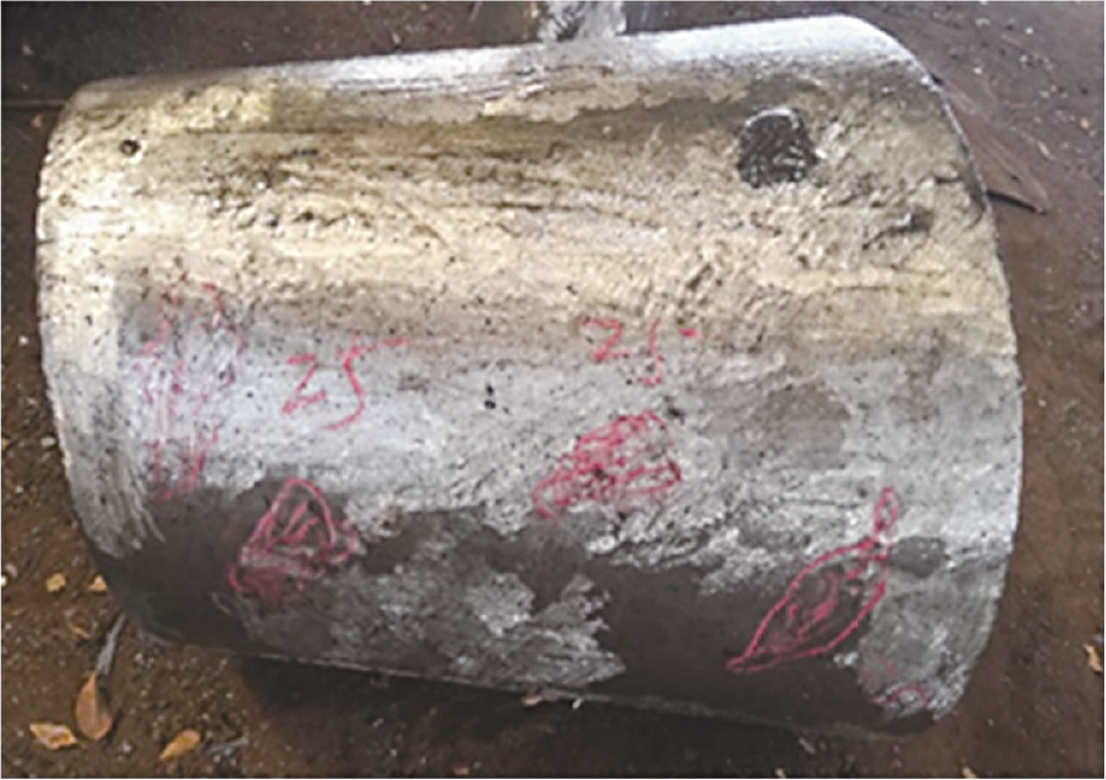
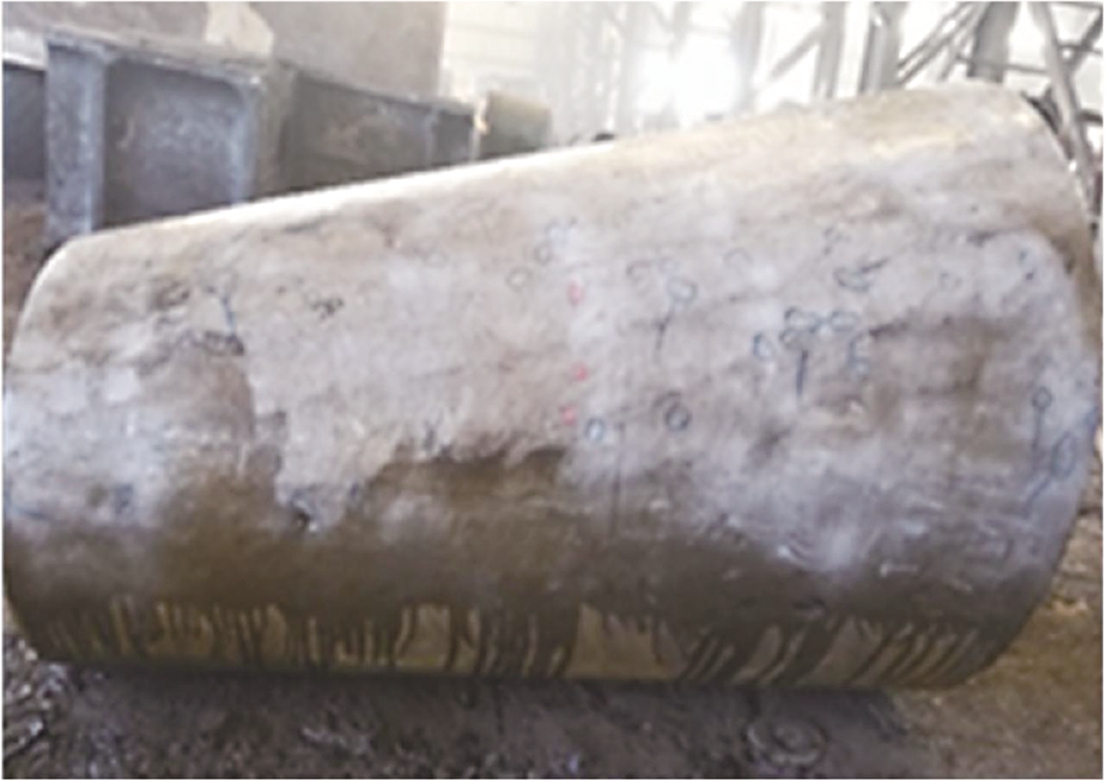
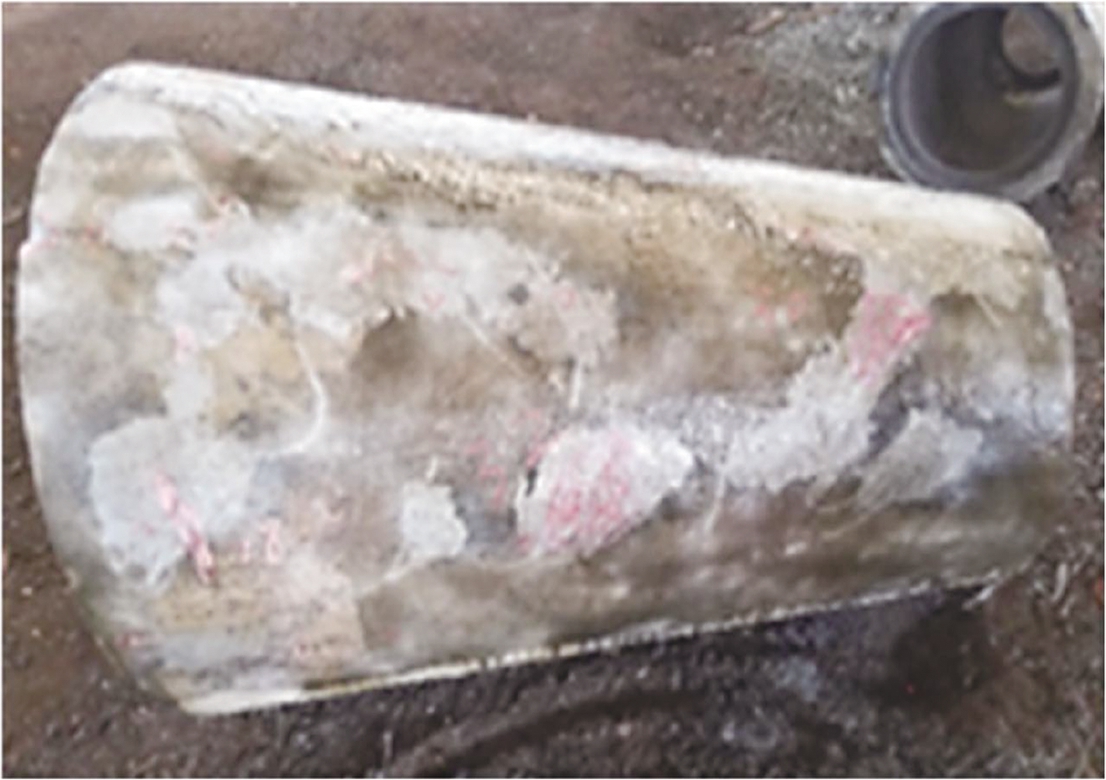
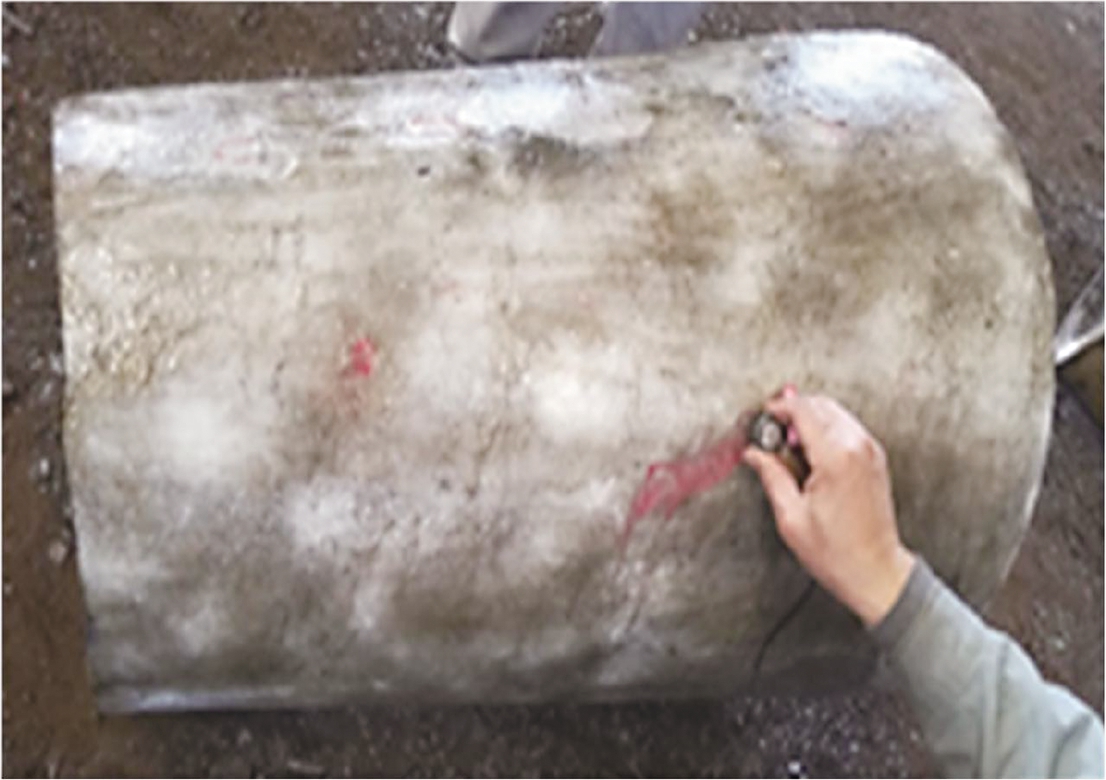
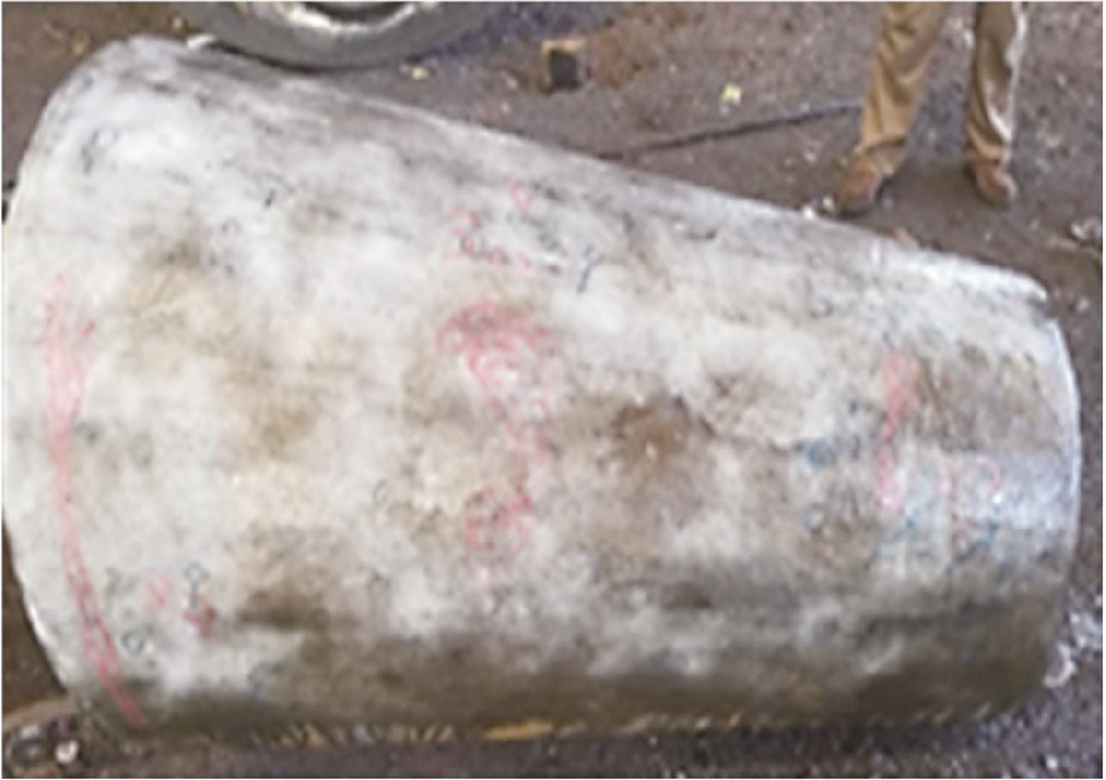
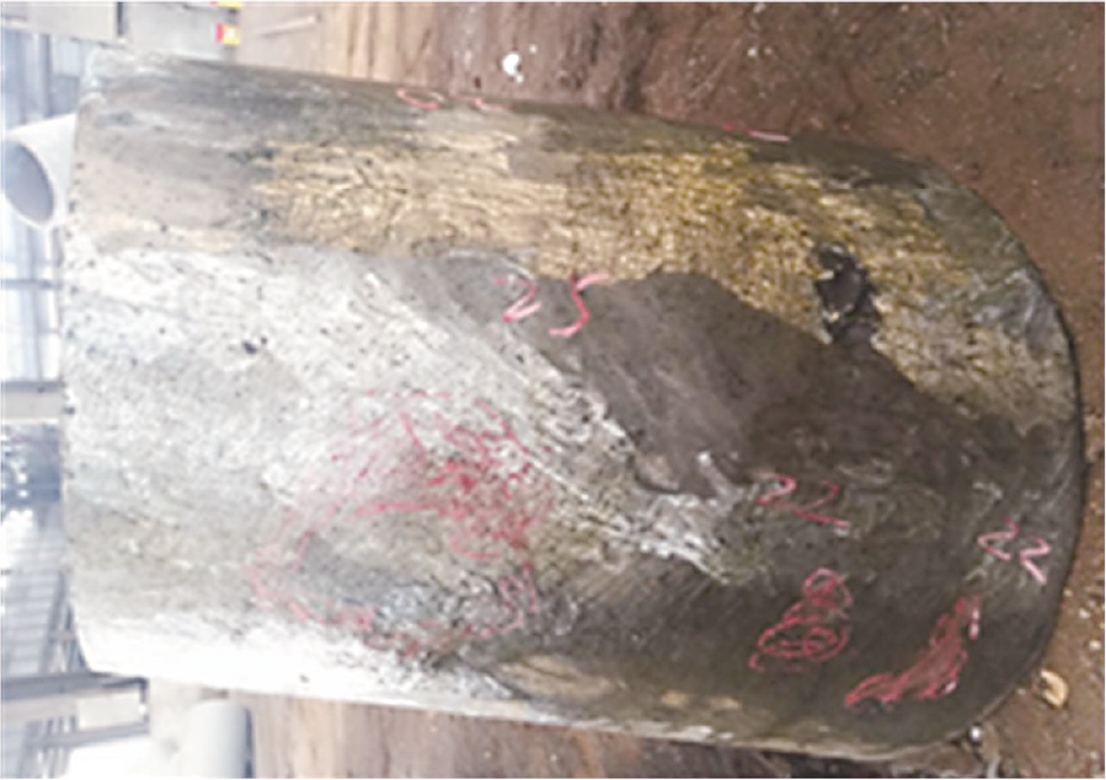
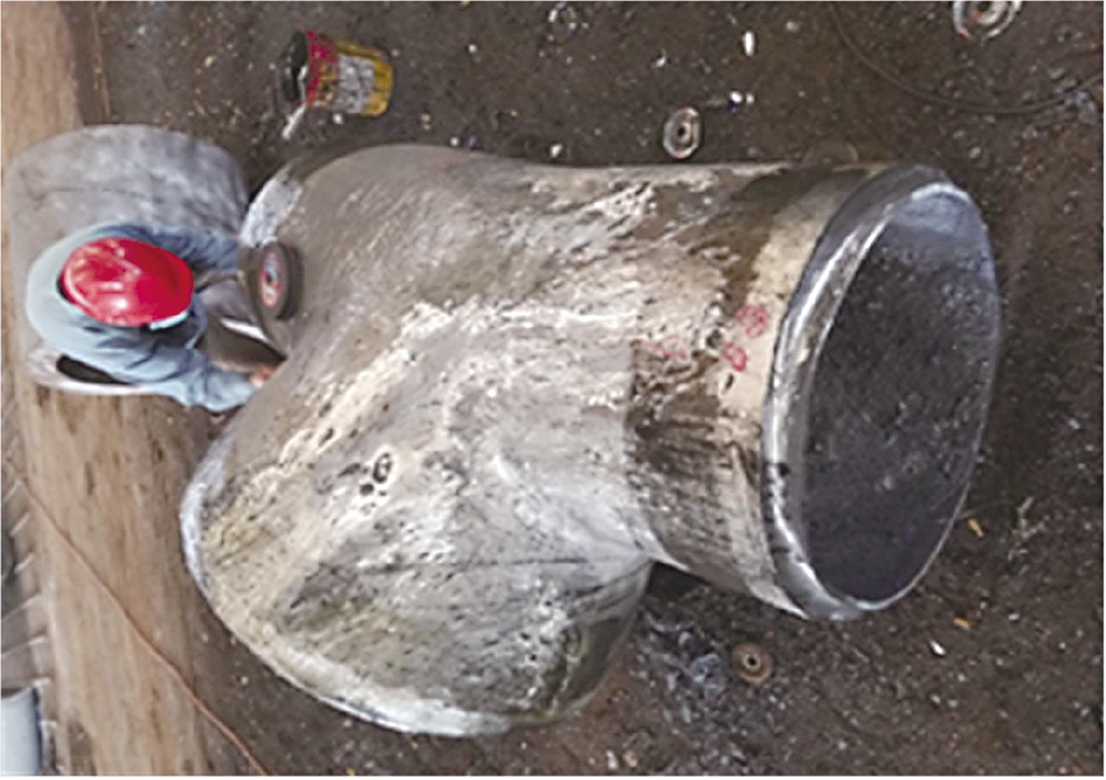
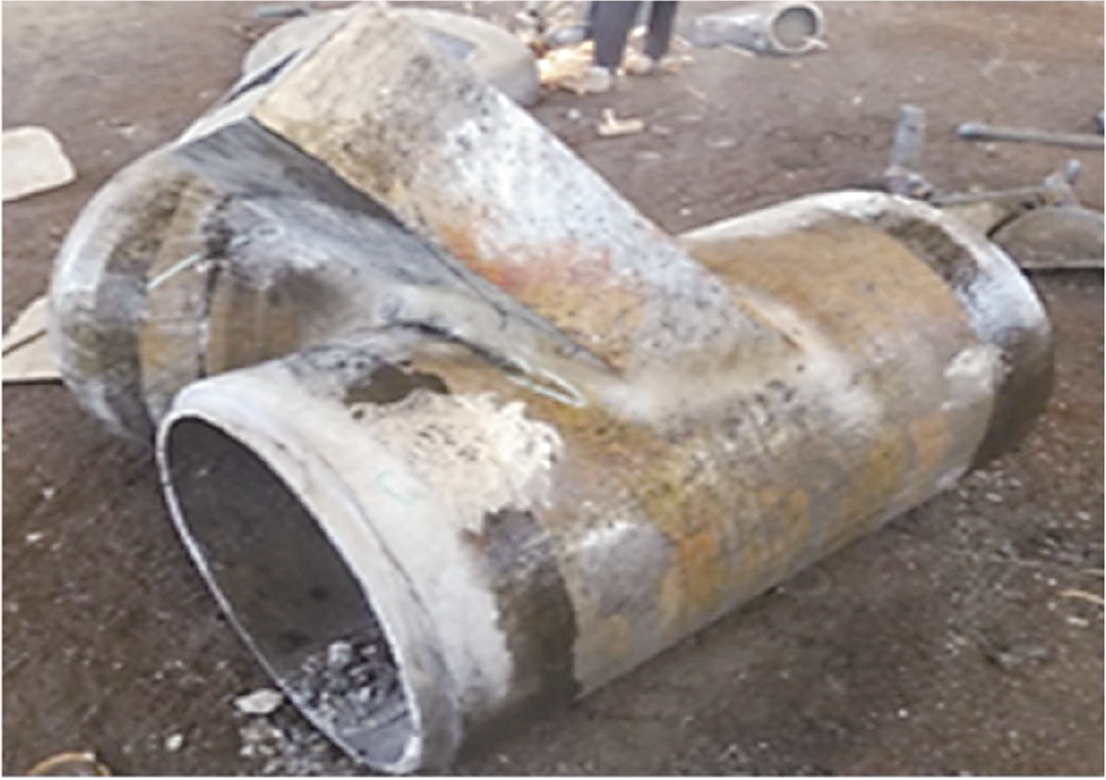
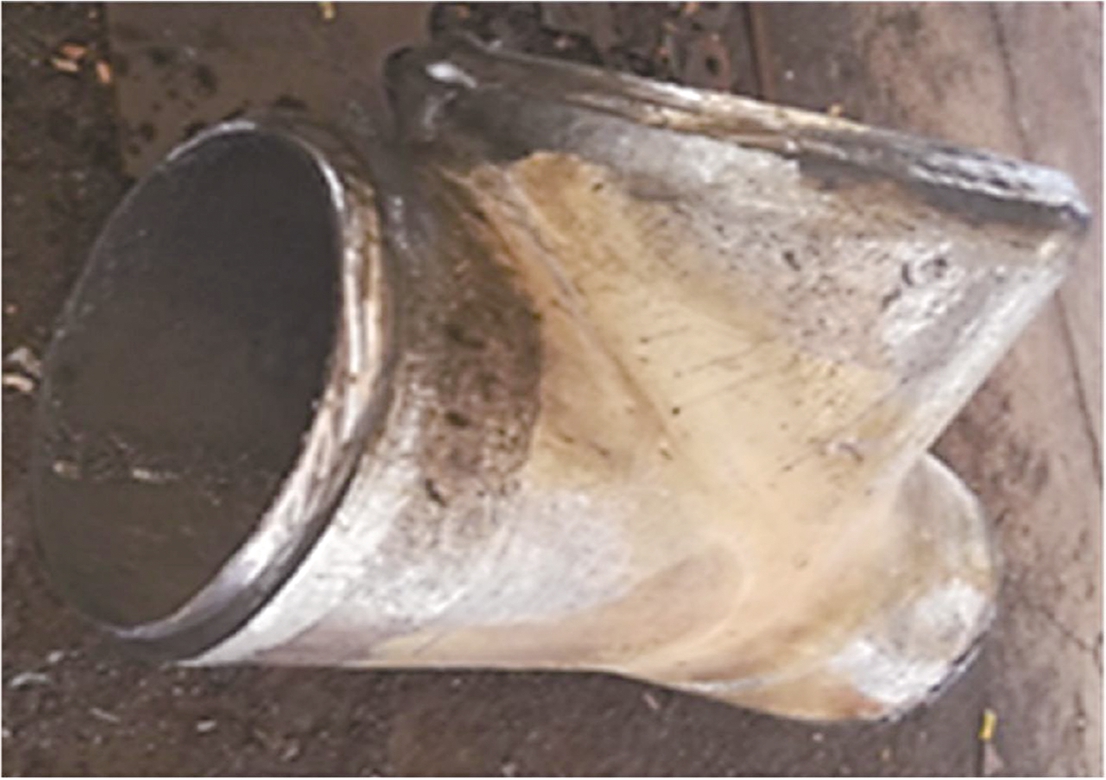
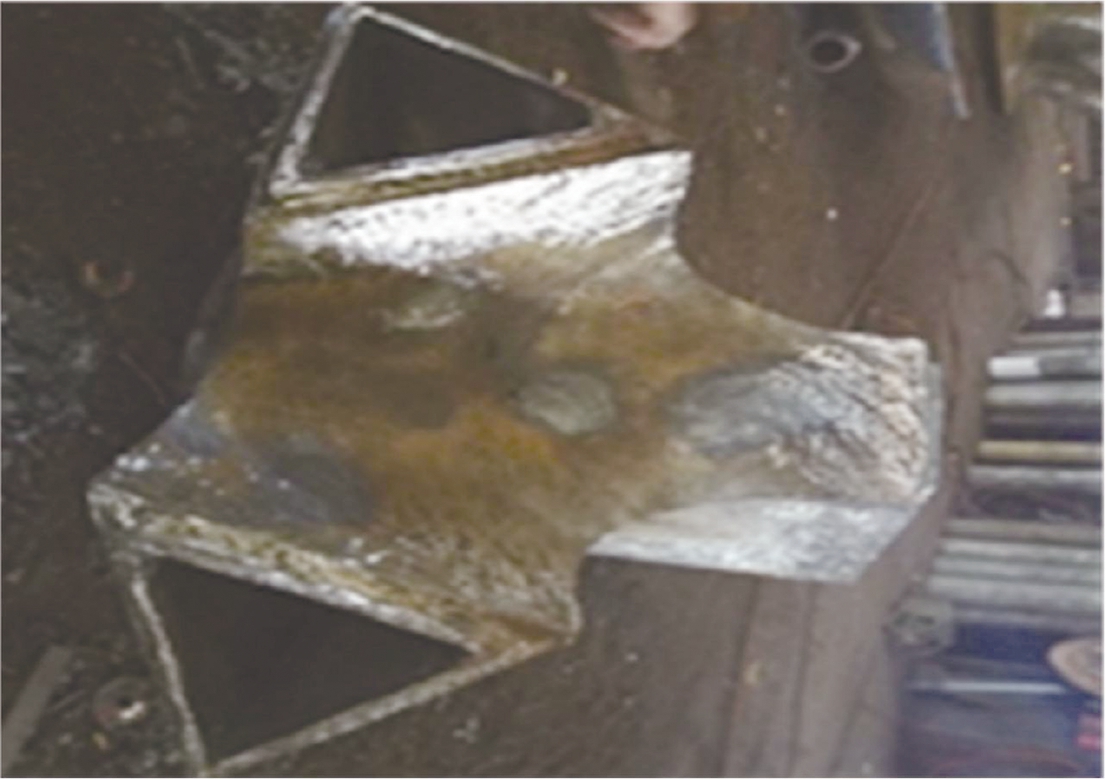
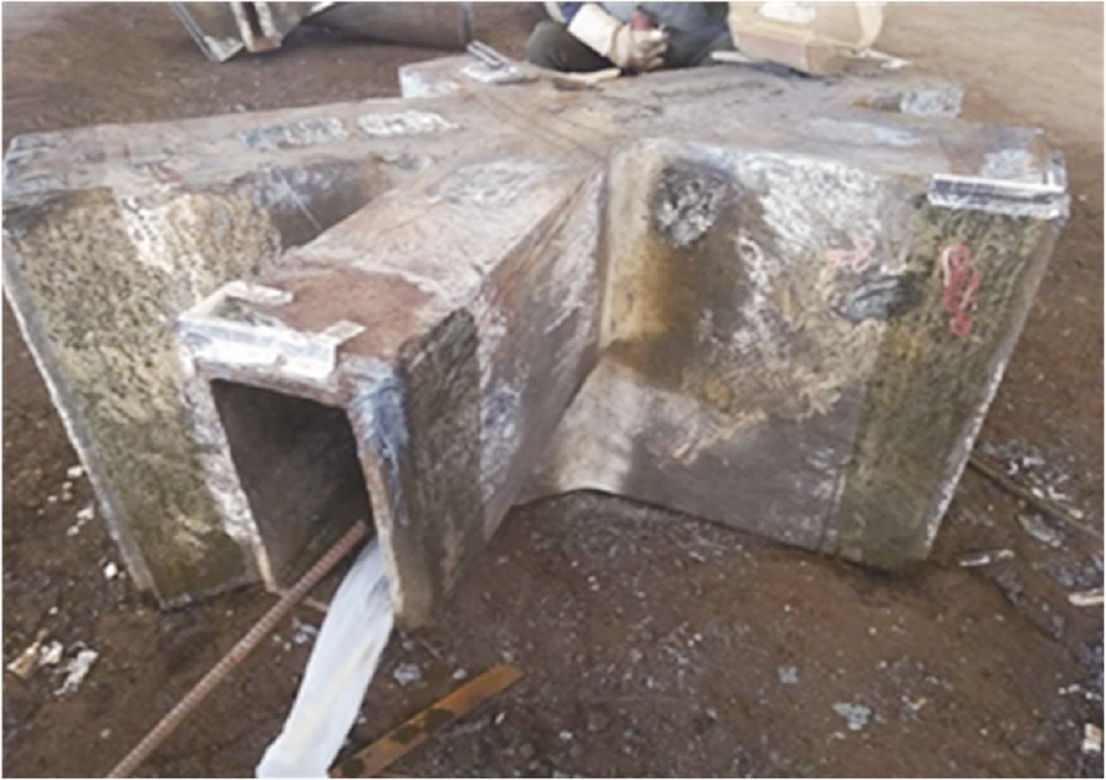
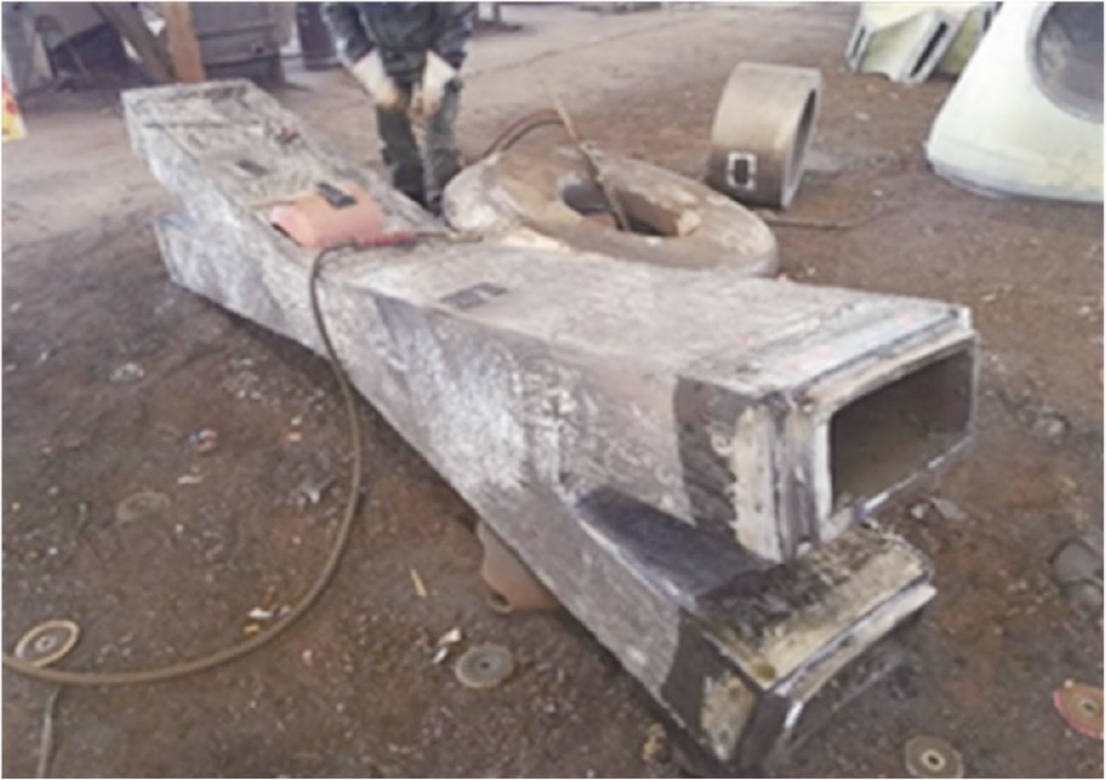
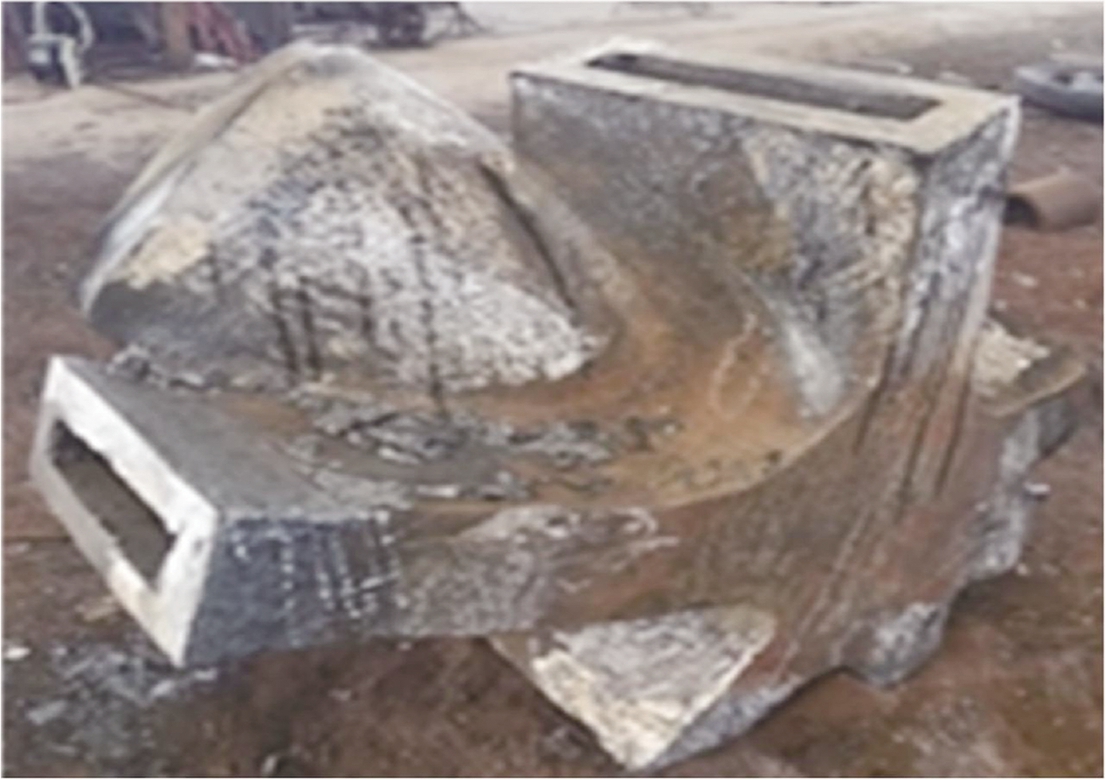
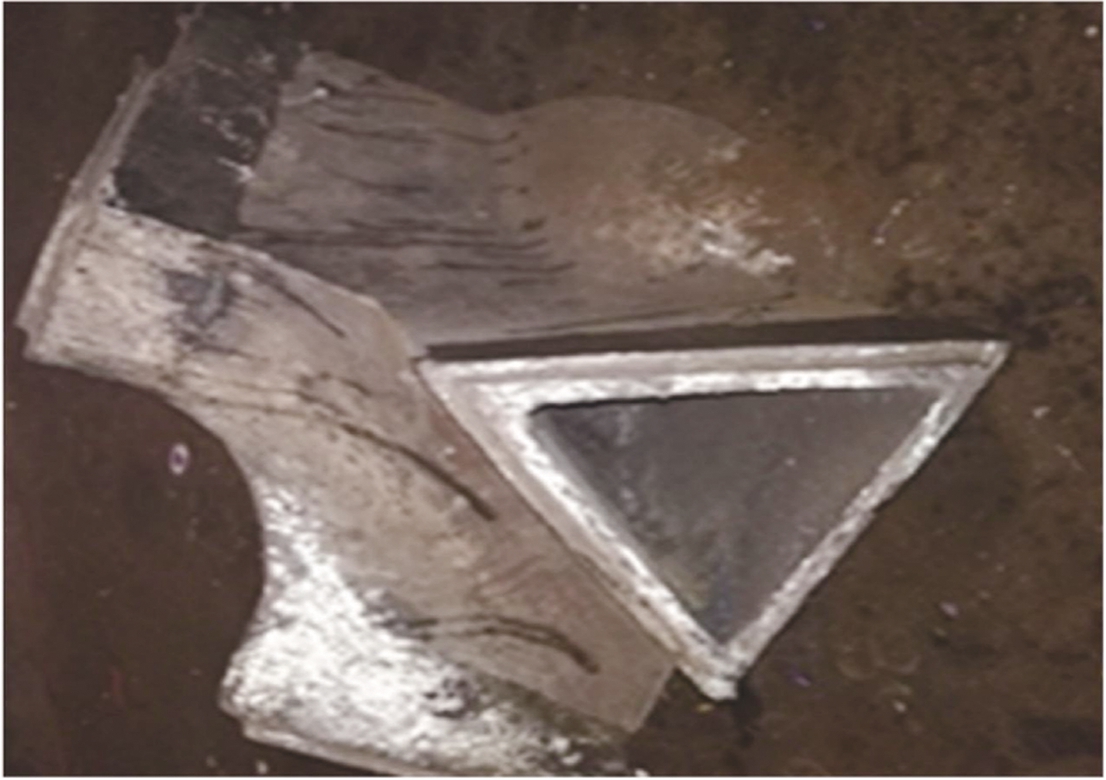
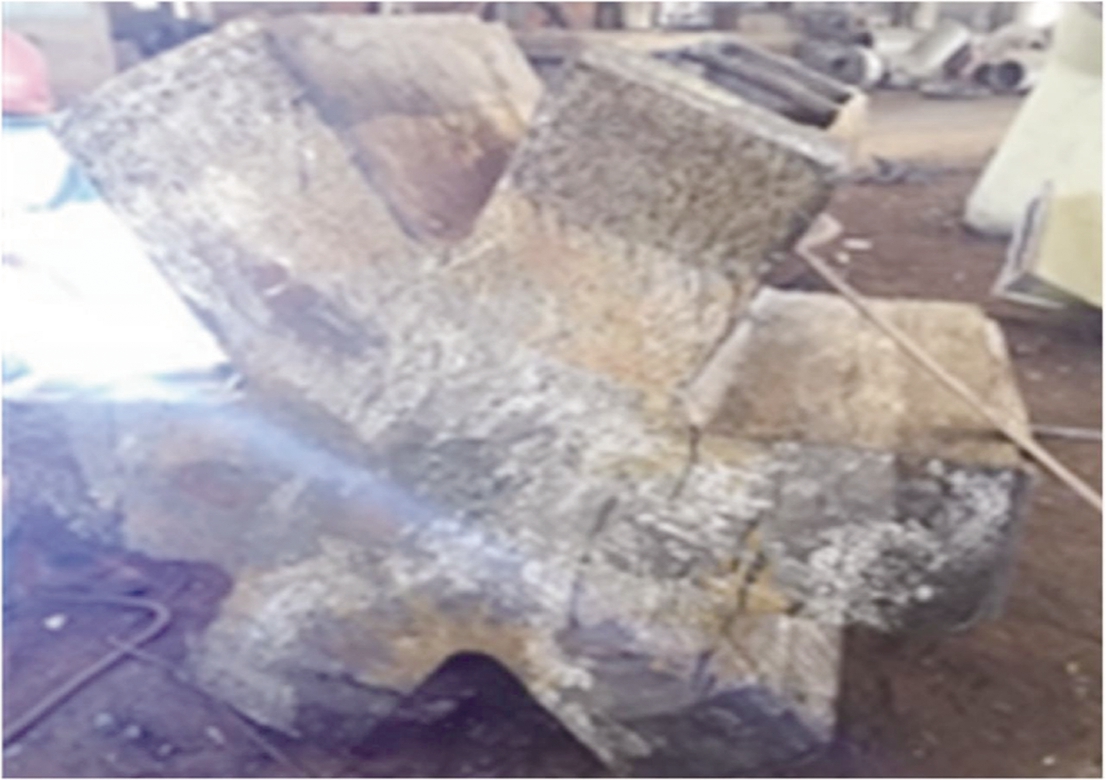
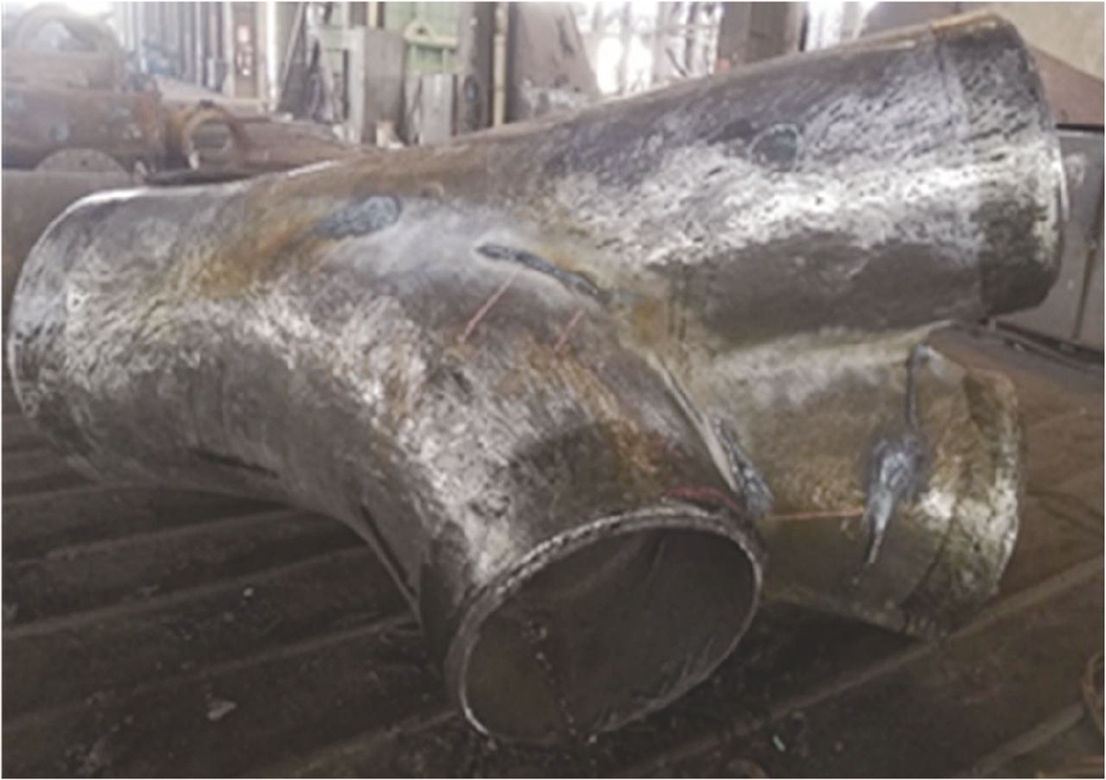
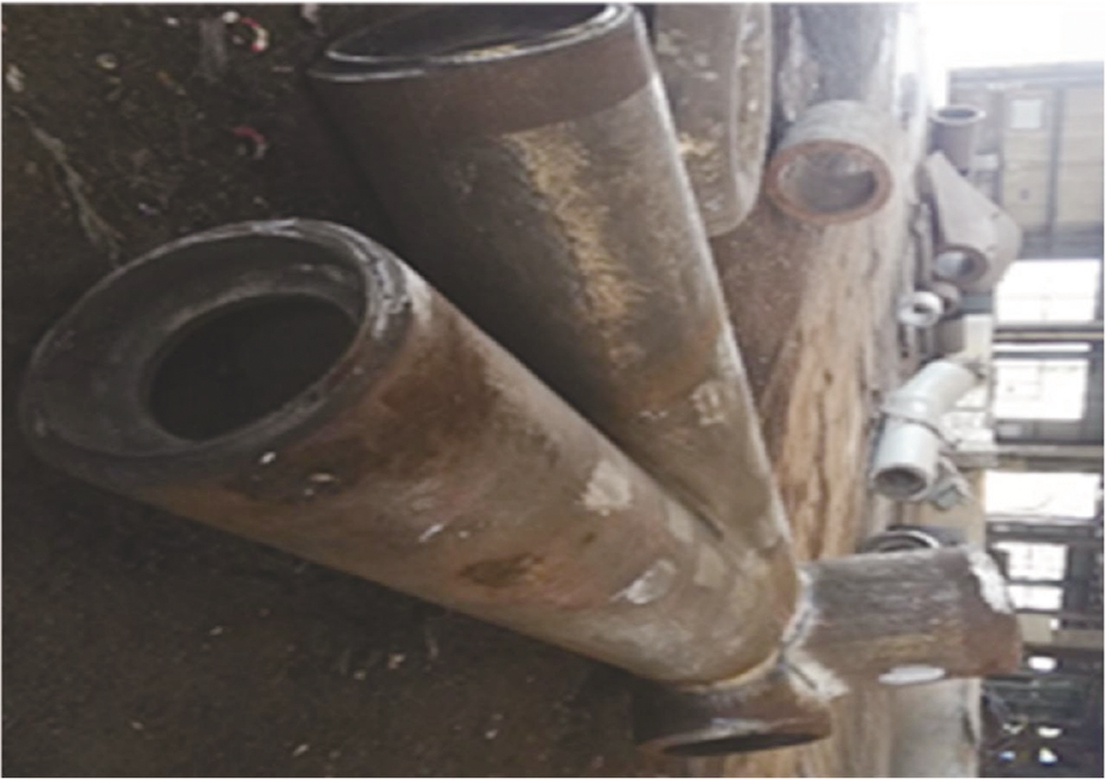
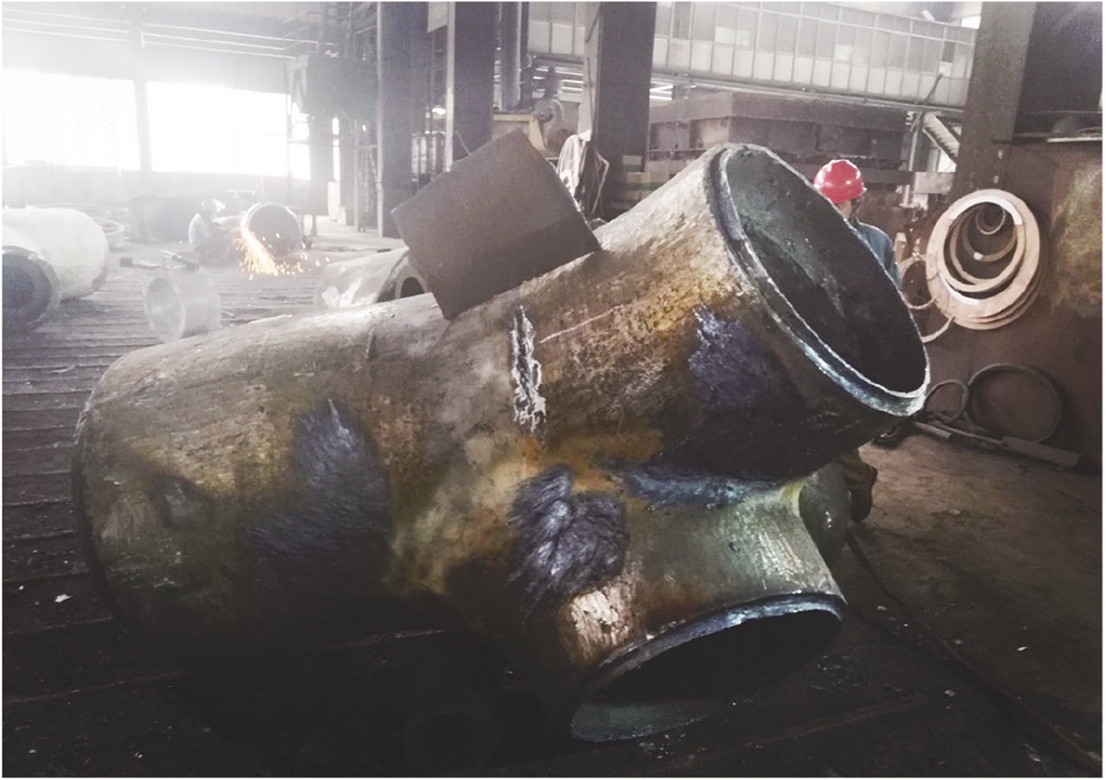
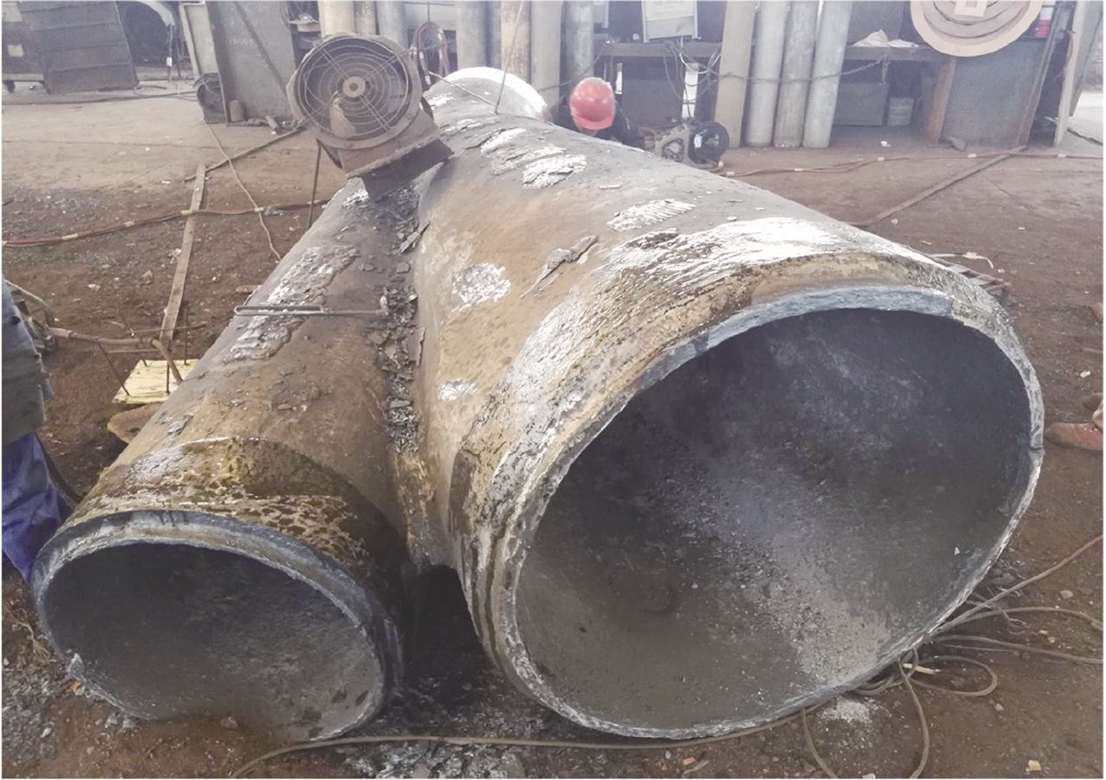
The NDT samples were 24 cast steel joints randomly selected from cast steel joints of civil engineering structures produced from March 2019 to May 2019 in a steel casting plant.The sizes of the 24 samples ranged from 0.6 to 4.0 m, and the wall thickness distribution ranged from 40 to 60 mm.The 24 cast steel joints were divided into simple or complex cast steel joints based on whether there is a pipe-to-pipe intersection area.The appearance of 11 simple cast steel joints is shown in Fig.1, and the appearance of 13 complex cast steel joints is shown in Fig.2.
(a)
(b)
(c)
(d)
(e)

(f)

(g)
(h)
(i)
(j)

(k)
Fig.1 Test specimens of simple cast steel joints.(a)J1;(b)J2;(c)J3;(d)J4;(e)J5;(f)J6;(g)J7;(h)J8;(i)J9;(j)J10;(k)J11
(a)
(b)
(c)
(d)
(e)
(f)
(g)
(h)
(i)
(j)
(k)
(l)
(m)
Fig.2 Test specimens of complex cast steel joints.(a)F1;(b)F2;(c)F3;(d)F4;(e)F5;(f)F6;(g)F7;(h)F8;(i)F9;(j)F10;(k)F11;(l)F12;(m)F13
The engineering structures of the cast steel nodes in the samples include high-speed railway station roof truss structures, stadium roof truss structures, and library roof truss structures.The materials used for cast steel joints are all G20Mn5N, and their chemical composition and basic mechanical properties are shown in Tab.1 and Tab.2, respectively.The testing results show that the chemical composition of the test specimens is in full compliance with the regulation JGJ/T 395—2017[20].
Tab.1 Chemical composition of G20Mn5N cast steel %

Massfractionm(C)m(Si)m(Mn)m(S)m(P)m(Ni) Specification0.17to0.23≤0.601.00to1.60≤0.020≤0.020≤0.80 Test0.1960.4191.530.0170.01160.268
Tab.2 Mechanical properties of G20Mn5N cast steel

MechanicalpropertyElasticmodulus/GPaYieldstrength/MPaUltimatestrength/MPaElongation/%Specification206300480to620≥20Test23032048331.9
2.2 Visual testing results
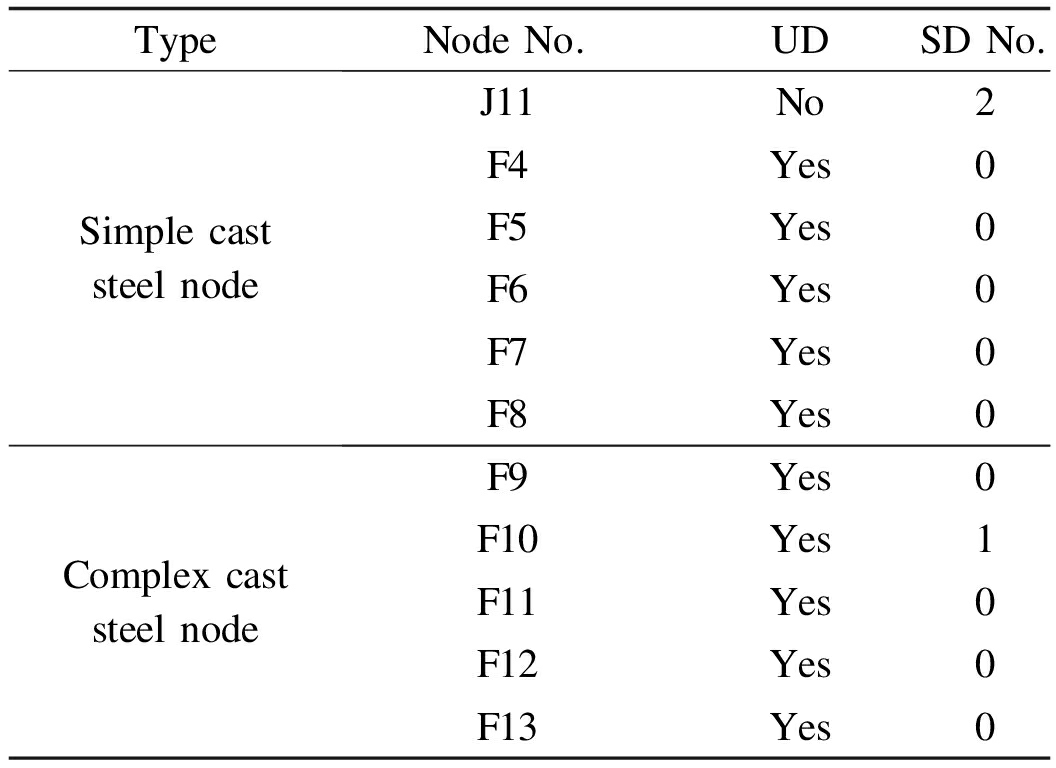
Visual inspection is the first and indispensable step of the factory inspection of cast steel nodes.The defects on the outer surface of cast steel joints seriously affect the service performance of cast steel joints due to the action of corrosion.Visual inspection can preliminarily detect the defects on the outer surface of cast steel joints.Through visual inspection, a total of 11 cast steel nodes were found to have defects in the 24 cast steel nodes, and only two types of defects were found: unfusion defects(UDs)and shrinkage defects(SDs).Tab.3 summarizes the visual inspection results according to two types of nodes, namely, simple and complex nodes.Among the 11 simple nodes, only one node with casting defects, i.e., J11, was detected by visual inspection.Two SDs were also detected in J11.Furthermore, 10 cast steel joints with defects were detected by visual inspection among the 13 complex cast steel joints.The 10 complex cast steel joints all have core support UDs, which are also found on the F10 cast steel joints.Based on the displayed statistical results, the probability of SDs on the surface is relatively low, regardless of whether it is a simple or complex cast steel joint node.The surface of simple nodes generally does not have core support UDs.The probability of failure of the core support fusion on the surface of a complex cast steel joint is high(up to 76.9%).
Tab.3 Statistics of visual inspection results
TypeNodeNo.UDSDNo.SimplecaststeelnodeJ11No2F4Yes0F5Yes0F6Yes0F7Yes0F8Yes0ComplexcaststeelnodeF9Yes0F10Yes1F11Yes0F12Yes0F13Yes0
2.3 Magnetic particle testing results
After the visual inspection of the cast steel nodes, magnetic particle inspection of the complex cast steel nodes in the intersection area of the pipe and tube was carried out to identify the types and distribution of defects on the surface and near the surface of the intersection area.Magnetic particle testing shall refer to the national standard GB/T 9444—2007[21].The flaw detection of cast steel nodes using magnetic powder revealed that 4 of 13 complex cast steel nodes, namely, F10, F11, F12, and F13, had defects in the intersection area of cast steel joints, and the defects were all cracks.Four cracks were detected in F10 and F11, three cracks were detected in F12, and one crack defect was detected in F13.The probability of crack defects on the surface or near the surface of complex cast steel joints in the intersection area of pipes was 30.8%.
2.4 Ultrasonic testing results
Visual inspection and magnetic particle inspection are suitable for the detection of defects on or near the surface of steel castings, and ultrasonic inspection can be used for the detection of internal defects of castings.The ultrasonic flaw detection process of 24 steel castings shall refer to the standard GB/T 7233.1—2009[16].The general defect indication types are given by this standard.For uncertain defects, other proven and effective NDT methods can be used for inspection, such as radiographic inspection.Suppliers and demanders can negotiate with each other if no conclusion can be reached through detection.The instruments used for the ultrasonic flaw detection of steel castings shall comply with the relevant provisions of the standard JB/T 10061—1999[22].The ultrasonic testing instrument used in this test is the PXUT-320C digital ultrasonic flaw detector.The probe of this ultrasonic flaw detector adopts the longitudinal-wave double-crystal probe, the probe frequency adopts 2.5 GHz, the coupling agent adopts the paste function, and the contrast test block is the ZGS contrast test block for the longitudinal-wave double-crystal probe.
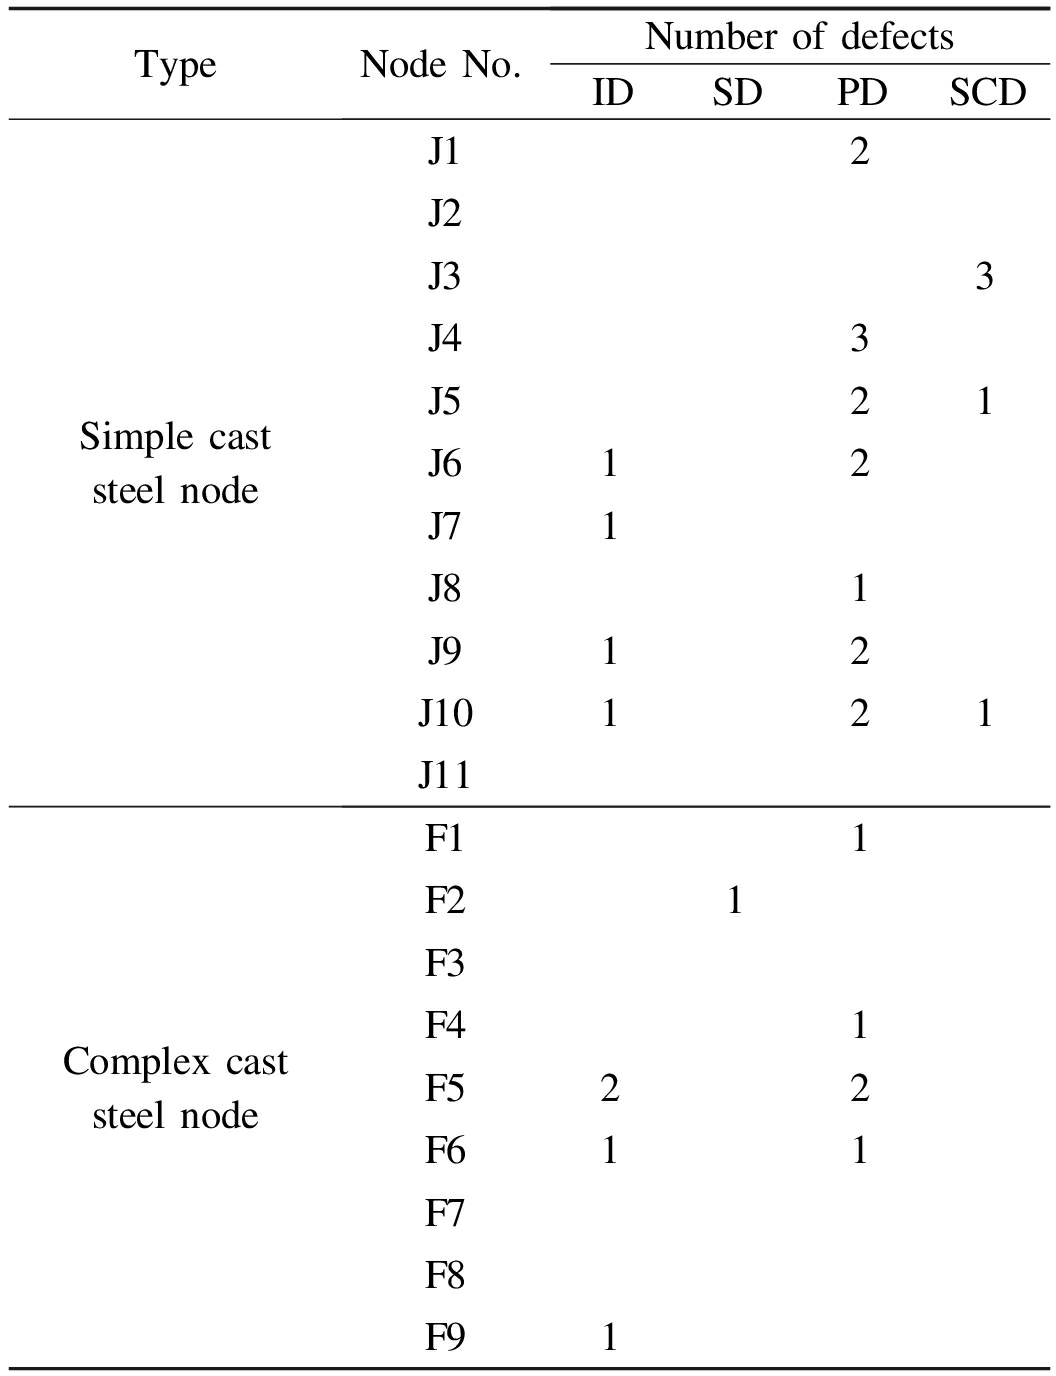
The ultrasonic NDT results of 24 cast steel joints for civil engineering structures are summarized in Tab.4.Through ultrasonic NDT, four kinds of defects, namely, inclusion defect(ID), porosity defects(PDs), SDs, and delamination defects(DDs), were detected in 11 simple cast steel joints.Four simple cast steel joints have IDs, seven simple cast steel joints have PDs, three simple cast steel joints have SDs, and two simple cast steel joints have DDs.Three kinds of casting defects, namely inclusions, shrinkage cavities, and air pores, were found in 13 complex cast steel joints.There are IDs in three complex cast steel joints, shrinkage cavity defects(SCDs)in one complex cast steel joint, and PDs in four complex cast steel joints.DDs were only detected inside the simple cast steel nodes, but simple and complex cast steel nodes will produce IDs and PDs.The results show that the probability of PDs is the highest in simple and complex cast steel joints, the statistical probability of PDs in simple cast steel joints is 63.6%, and the statistical probability of PDs in complex cast steel joints is 30.8%.The frequency of PDs is high, and the number of detected defects is also the largest.14 PDs were detected in the simple cast steel joints, which were 3.5 times the number of IDs, 2.8 times the number of shrinkage PDs, and 7 times the number of DDs.A total of five pore defects were detected inside the complex cast steel nodes, which is 1.25 times the number of IDs and 5 times the number of SDs.
Tab.4 Statistics of the ultrasonic testing results
TypeNodeNo.NumberofdefectsIDSDPDSCDDDSimplecaststeelnodeJ12J21J33J43J521J6121J71J81J912J10121J11ComplexcaststeelnodeF11F21F3F41F522F611F7F8F91
3 Analysis of the NDT Results
3.1 Statistics of the NDT results
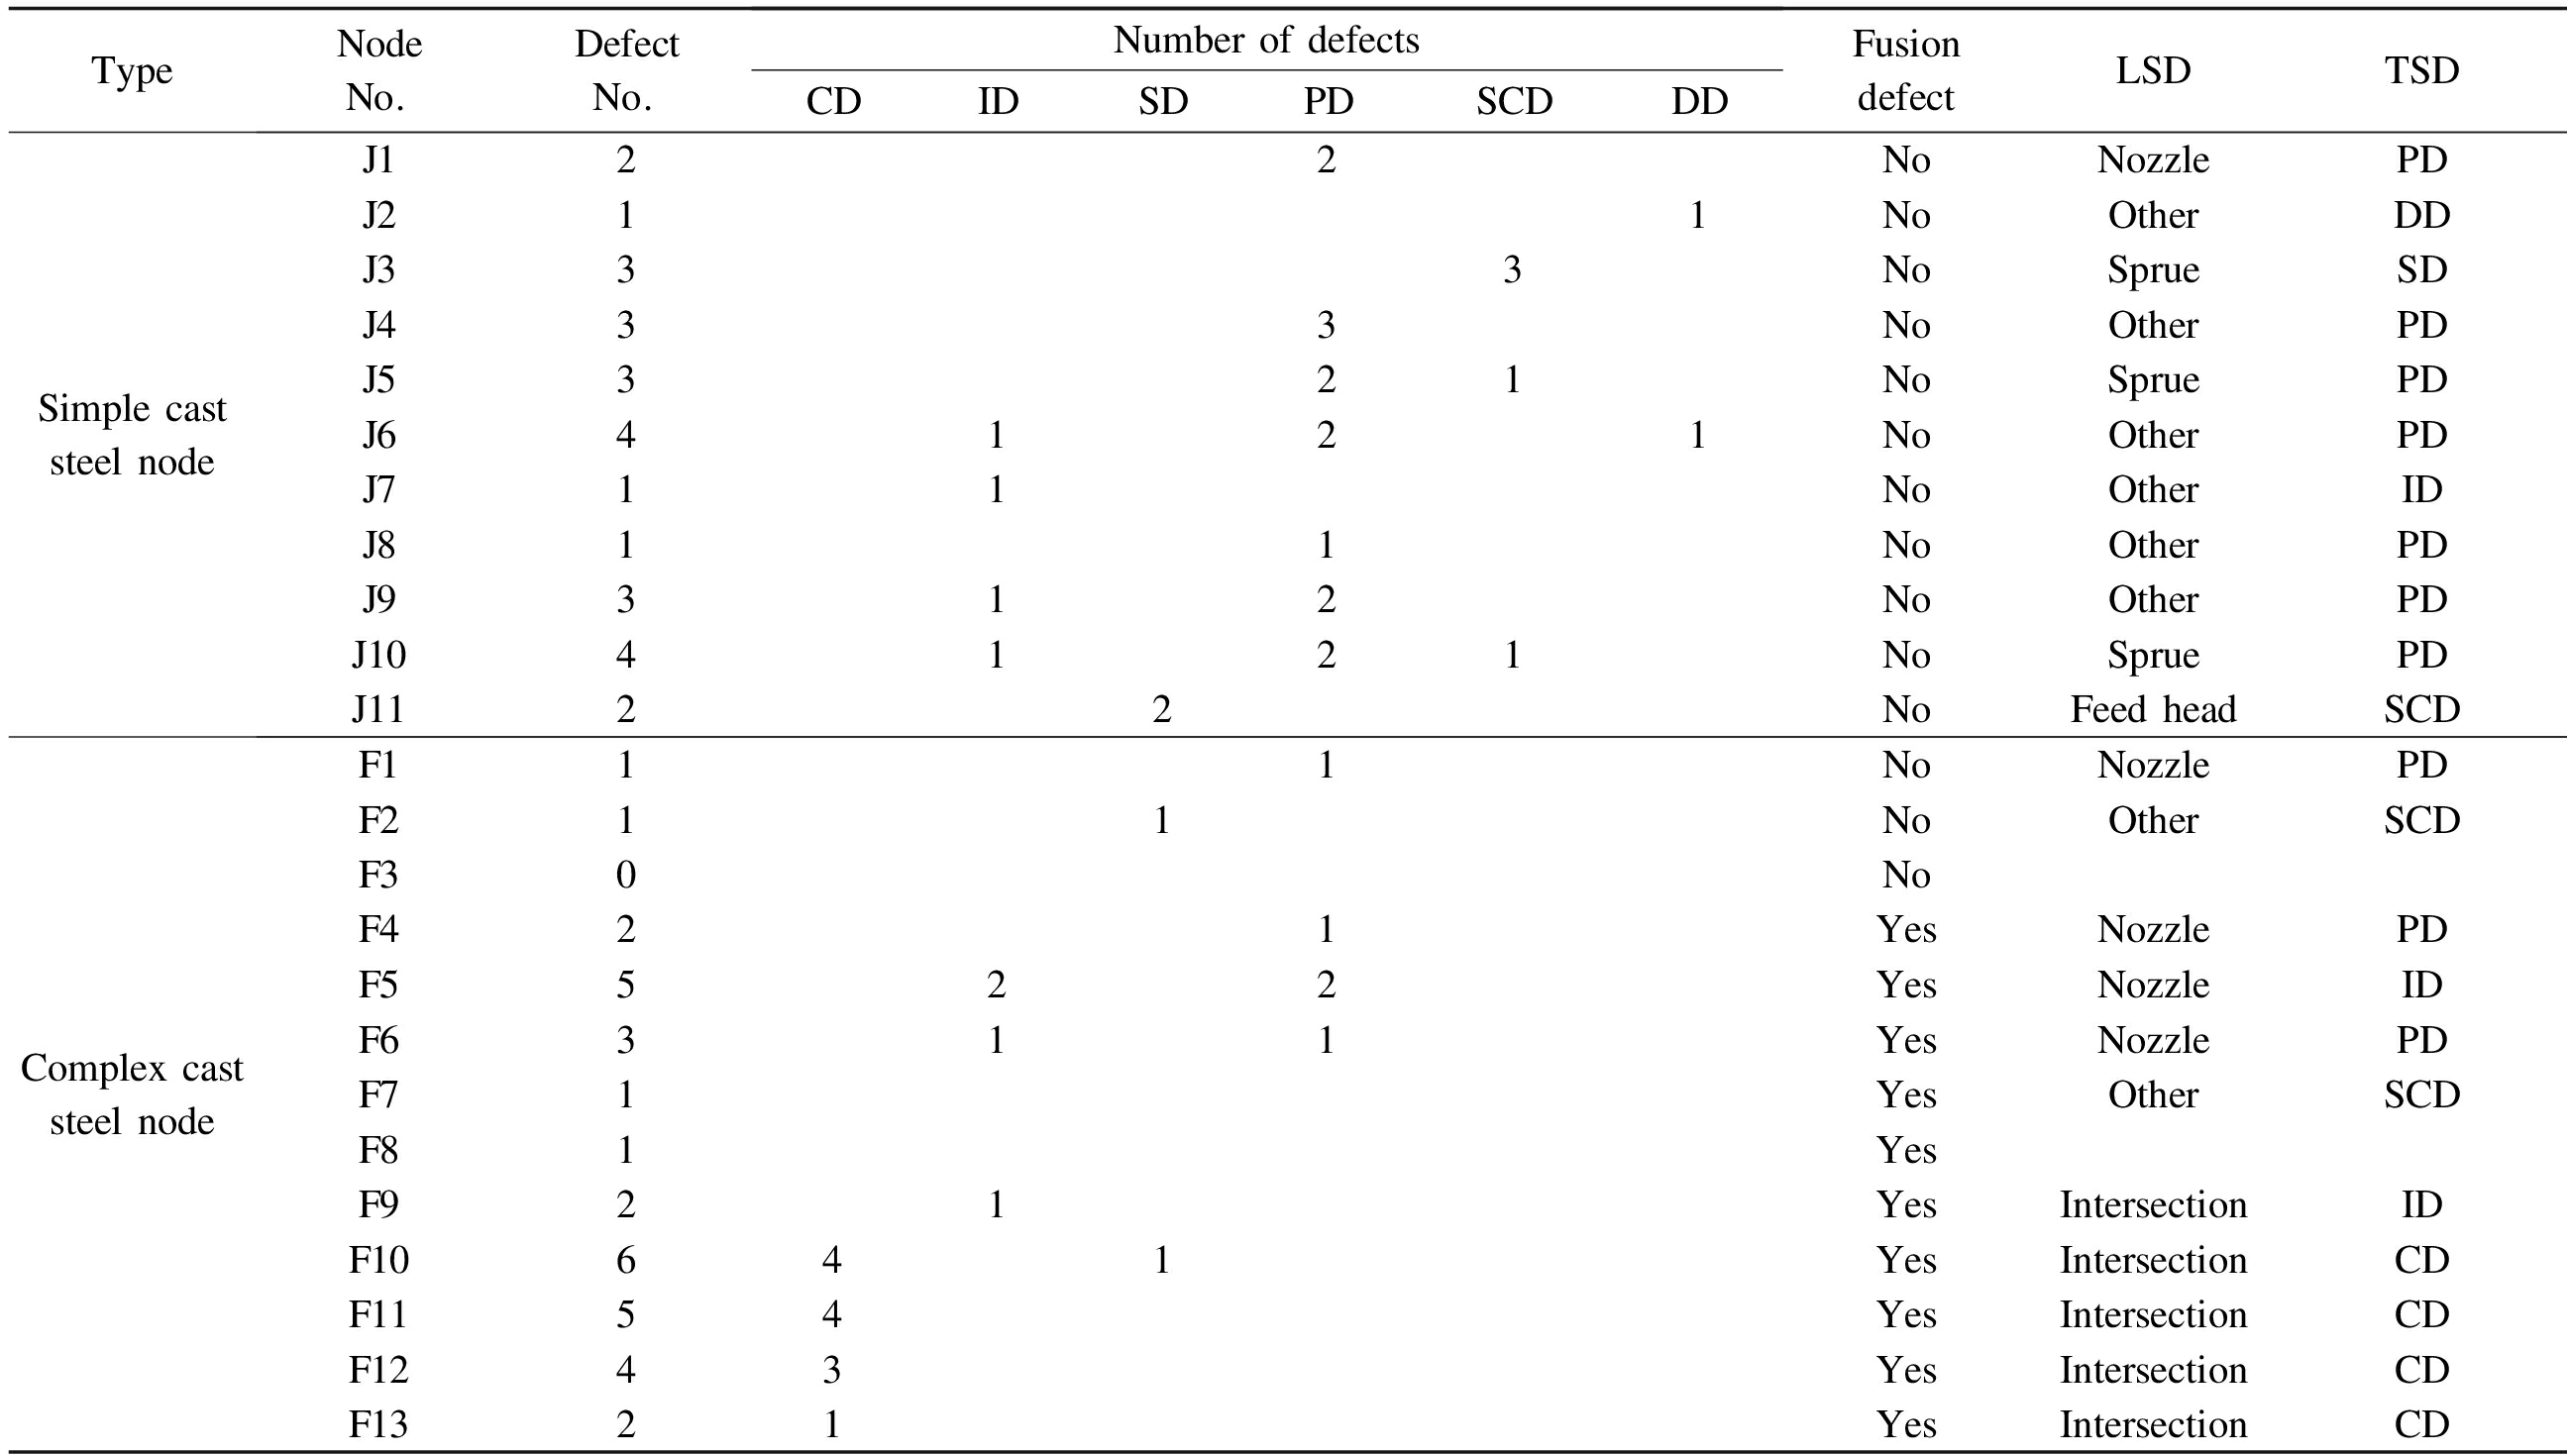
Consequently, the results, including the location of the most serious defects(LSDs)and type of the most serious defects(TSDs)corresponding to the number of nodes obtained via visual testing, magnetic particle testing, and ultrasonic testing, are summarized in Tab.5.
Tab.5 Summary of the NDT results
TypeNodeNo.DefectNo.NumberofdefectsCDIDSDPDSCDDDFusiondefectLSDTSDSimplecaststeelnodeJ122NoNozzlePDJ211NoOtherDDJ333NoSprueSDJ433NoOtherPDJ5321NoSpruePDJ64121NoOtherPDJ711NoOtherIDJ811NoOtherPDJ9312NoOtherPDJ104121NoSpruePDJ1122NoFeedheadSCDComplexcaststeelnodeF111NoNozzlePDF211NoOtherSCDF30NoF421YesNozzlePDF5522YesNozzleIDF6311YesNozzlePDF71YesOtherSCDF81YesF921YesIntersectionIDF10641YesIntersectionCDF1154YesIntersectionCDF1243YesIntersectionCDF1321YesIntersectionCD
The defects detected in the 11 simple cast steel joints were internal defects, and only two visible SDs existed in J11.Therefore, more attention should be paid to the internal defects of simple cast steel joints.In addition to the internal defects detected by ultrasonic inspection, there are many surface defects in the complex cast steel joints, such as unfused core support and crack defects.The core support UDs can be seen visually, and the crack defects mostly occur in the intersection area of the tube, which needs to be detected by magnetic powder.Therefore, it is necessary to pay more attention to the coordination of multiple NDT methods for complex cast steel nodes.
A total of 27 casting defects were detected in 11 simple cast steel nodes, including five types of casting defects, namely, inclusions, shrinkage porosity, porosity, shrinkage porosity, and delamination.Concurrently, a total of 33 casting defects were detected in 13 complex cast steel nodes, including five types of casting defects, namely, inclusions, shrinkage cavities, porosity, unfusion, and cracks.The average numbers of defects on each simple cast steel node and complex cast steel node are 2.45 and 2.54, respectively.Shrinkage porosity and delamination casting defects were only found on the simple cast steel joints, whereas cracks and UDs were only detected on complex cast steel joints.Inclusions, shrinkages, and pore defects were detected on the simple and complex cast steel nodes.
Among the 24 cast steel nodes, only the F3 node had no defects detected, and the remaining nodes had different degrees and types of casting defects detected.Four out of the 24 cast steel nodes had crack defects detected, and the probability of this defect occurring in all cast steel node samples was 16.7%.Seven cast steel nodes had IDs, and the probability of IDs occurring in all cast steel node samples was 29.2%.Three nodes had SDs, and the probability of such defects occurring in all cast steel node samples was 12.5%.Eleven cast steel nodes had pore defects, and the probability of pore defects occurring in all cast steel node samples was 45.8%.SDs occurred in three nodes, and the probability of such defects in all cast steel node samples was 12.5%.Two nodes had DDs, and the probability of their occurrence in all cast steel node samples was 8.3%.Ten UDs were detected in the joints, and the occurrence probability of such defects in all cast steel joints was 41.7%.
Fig.3 displays the possibilities of having the different types of defects in the simple cast steel joints, complex cast steel joints, and all 24 specimens.As shown in Fig.3, the occurrence probability of core support UDs and surface crack defects in cast steel joints has a great relationship with the joint shape, and the occurrence probability of the two defects is great for large complex cast steel joints with the intersection area of pipes.By combining the internal and surface defects of cast steel joints, the probability of having PDs on simple cast steel joints is the largest, whereas the probability of having UDs on complex cast steel joints is the largest.When 24 cast steel joints were taken as the work sample for statistics, the occurrence probability of PDs was 45.8%, which was higher than that of UDs(41.7%).Therefore, pore defects are the most common type of defects in cast steel joints.
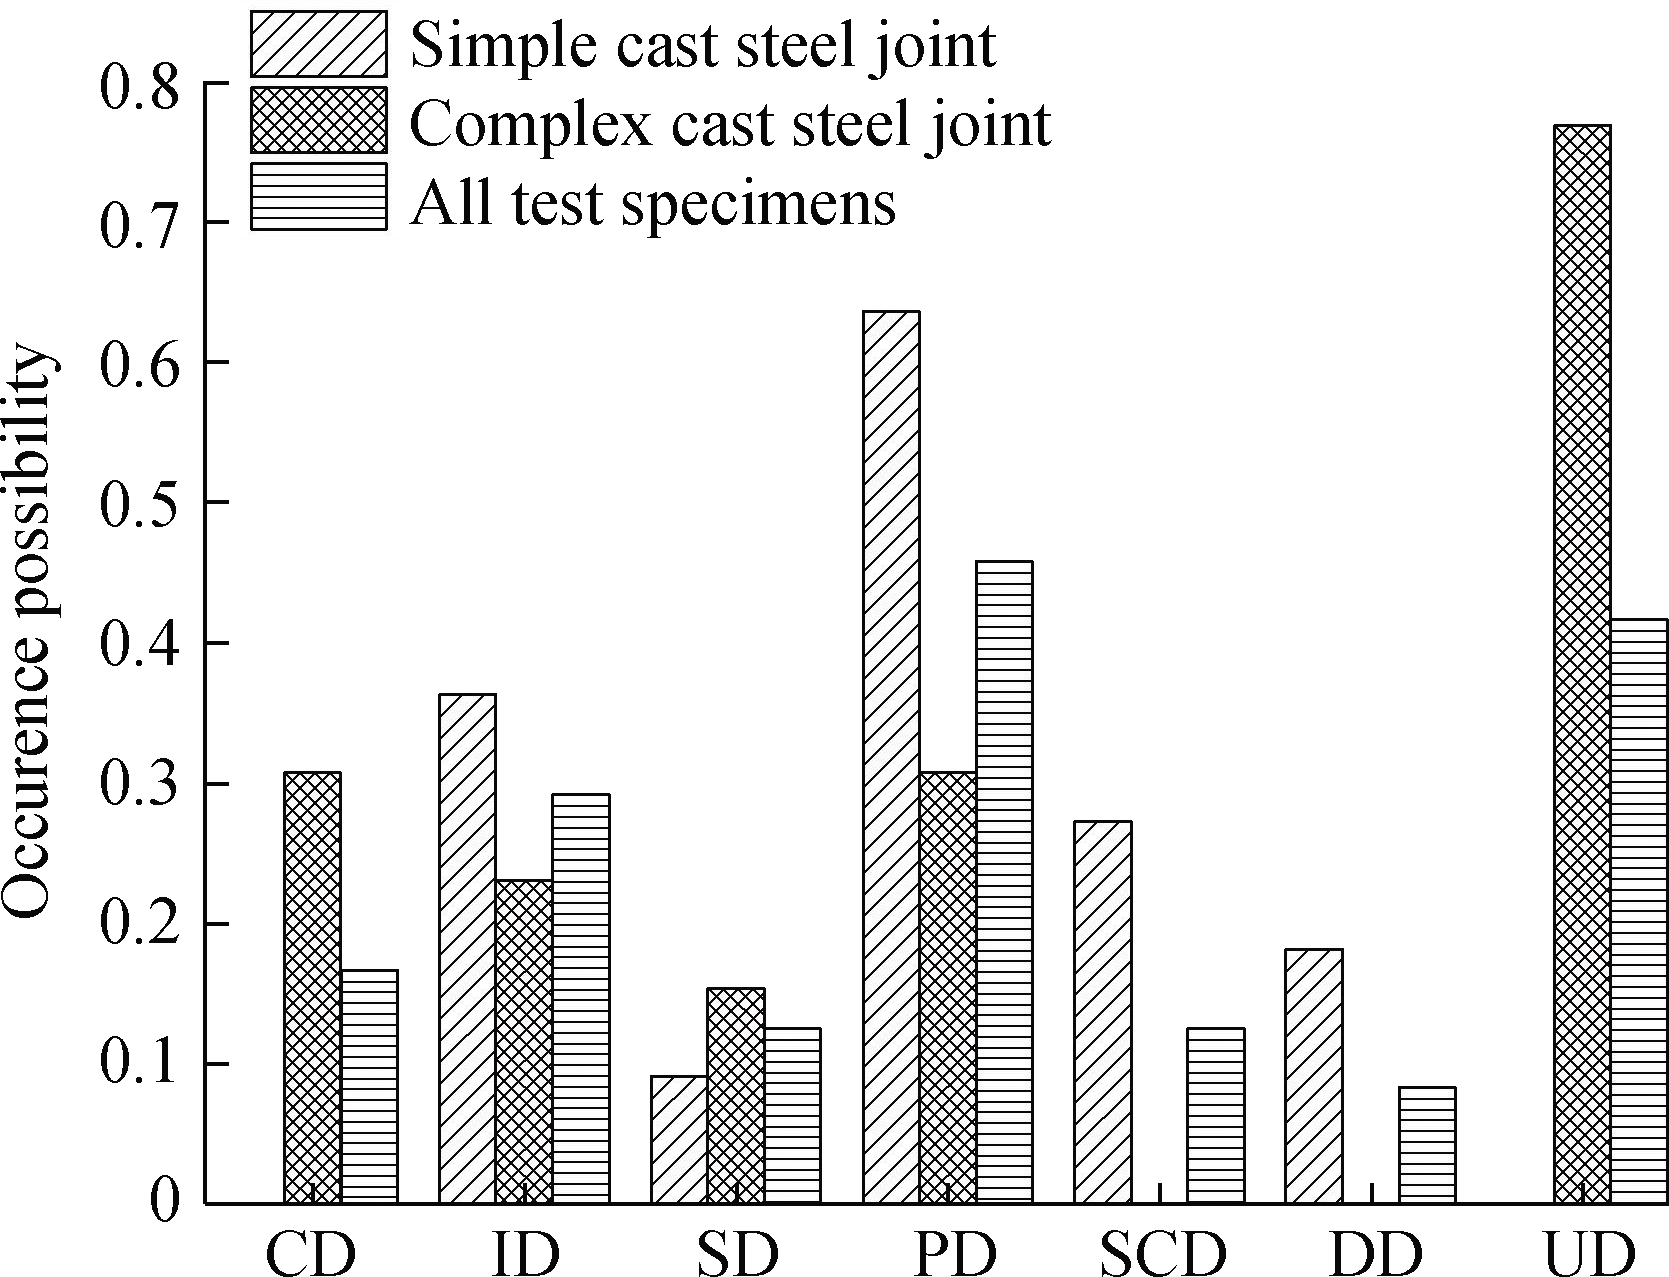
Fig.3 Occurrence possibility of the different types of defects in testing specimens
3.2 Analysis of the characteristic of cast defects
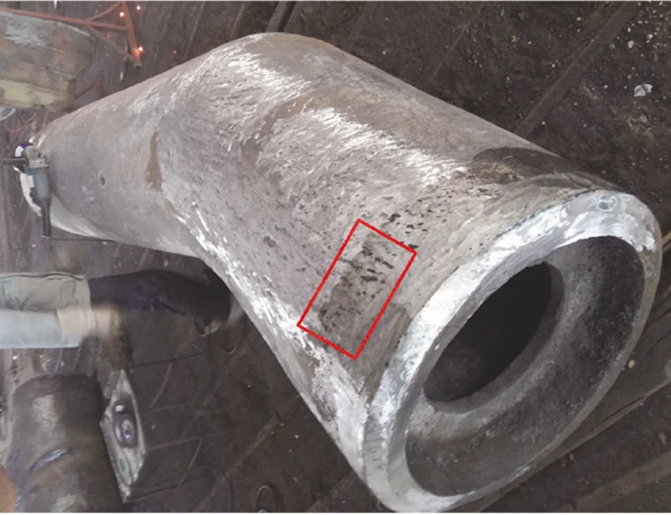
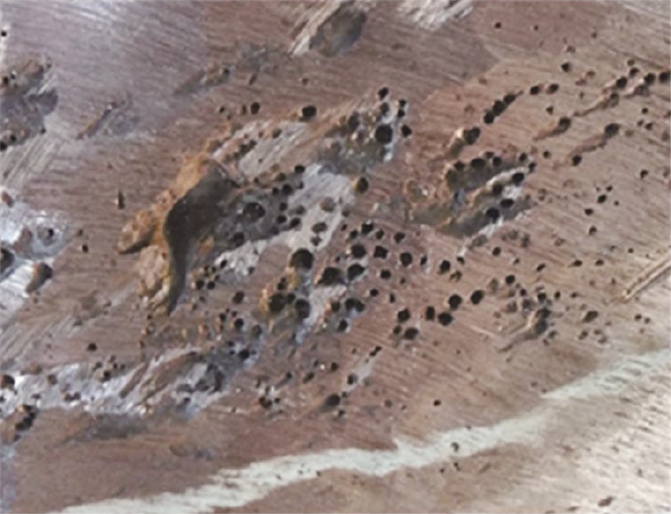
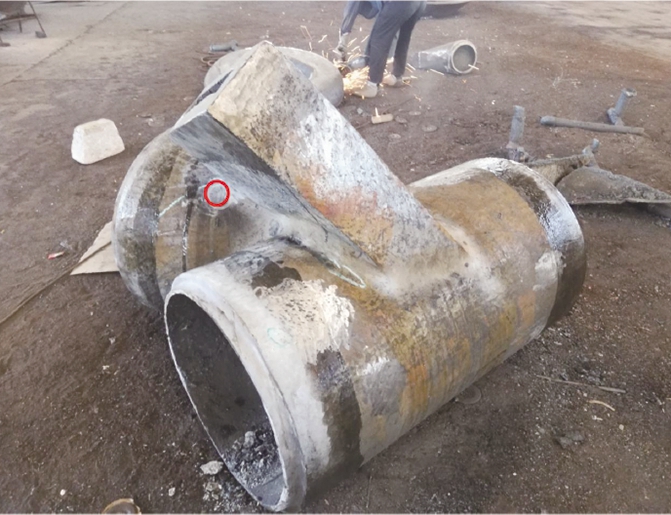
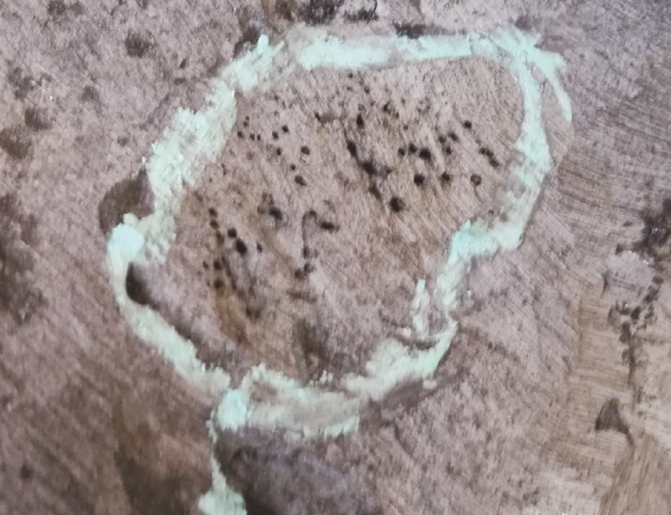
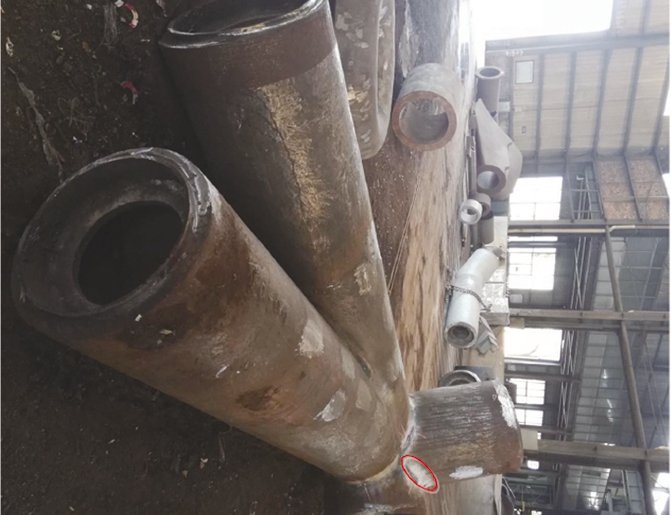
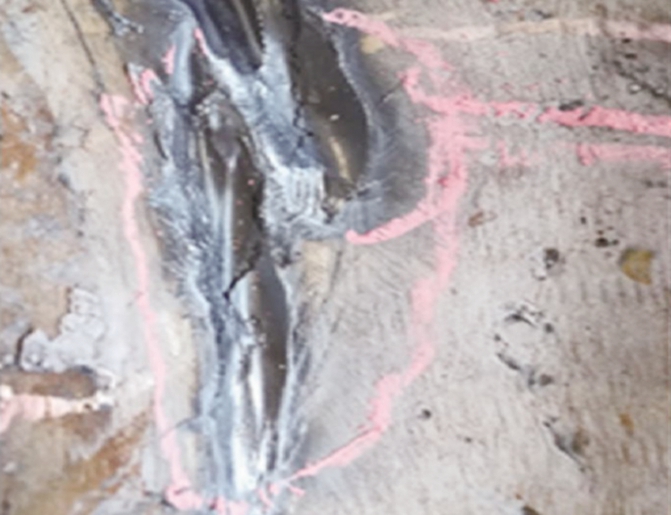
To intuitively understand the morphological characteristics of various defects, Fig.4 shows the shape and type of representative detected defects in the cast steel nodes.
(a)
(b)
(c)
(d)
(e)
(f)
Fig.4 Typical detected defects of the test specimens.(a)Location of the detected defect of J11;(b)Detected SD of J11;(c)Location of the detected defect of F2;(d)Detected SD of F2;(e)Location of the detected defect of F11;(f)Detected crack defect of F11
J11 is a simple cast steel joint with a simple shape and smooth transition.A riser SD was detected from the ultrasonic inspection, which was manifested as a concentrated distribution of multiple macroscopic pores connected with the atmosphere on the outer surface of the cast steel joint.F2 is a multi-pipe intersection cast steel joint.Its transition and chamfer zones between the cast steel node branch pipe and main pipe(R zone)were subjected to magnetic particle inspection, and the other areas were ultrasonically inspected.Consequently, an SD was detected in the cast steel joint.F11 is a multi-pipe intersection cast steel node, and its R zone was subjected to magnetic particle inspection.The other areas were ultrasonically inspected.Two types of defects, i.e., cracks and UDs, were detected in this specimen.The intersection area of the cast steel node tube and tube is prone to cracks mainly because the wall thickness is relatively large.The greater the wall thickness, the later the molten steel solidifies.Moreover, the solid line shrinkage of the molten steel in the solidification zone will be hindered, which will eventually lead to the generation of cracks.A casting crack is a very serious defect; once the crack defect is detected, the defect must be repaired.To reduce the probability of cracks, castings should be designed to avoid sudden changes in wall thickness.Process ribs or chilled iron can be added at locations prone to large stress and late solidification.The cross-section of a single sprue should not be too large and try to use multiple dispersed sprues, among others.In addition, the detected unfused core support is made of ordinary carbon steel, of which the surface is tinned.It is mainly used to fix sand mold and ensure wall thickness.A core support UD is formed when the core support cannot be completely melted in the molten iron.Then, the unfused part of the core support is equivalent to the partial loss of the cast steel node, to resulting in a corrosion penetration.Therefore, the core support is not allowed to have defects in the ISO and ASTM standards, and the steel casting plant must dig out 100% of these defects to repair welding.
According to the complete NDT results, the nonfusion of the core support is very common in complex casting steel joints, and most cast steel joints need repair welding.Cracks easily appear at the intersection line of multi-pipe cross cast steel joints.The distribution of inclusions is random, and there is no obvious law to follow with the flow of liquid steel.In addition, as shown in Tab.5 and Fig.4, porosity and inclusion are the main defects of cast steel joints, which are mainly induced by the improper setting of the casting system, riser design, and cold iron.To prevent the defect as much as possible, the location of the pouring riser, rib plate, and shape of the cast steel joint should be reasonably designed to maintain a sufficient solidification period for steel castings.The current research on the NDT of cast steel joints is limited, although it has provided the general rule on the defect distribution of cast steel joints in engineering structures.The NDT technology is not very accurate in the qualitative and location of defects, which cannot easily obtain the accurate distribution of defects.Furthermore, the types and distribution of macroscopic defects in cast steel joints will be analyzed by the NDT and cutting test, which laid a foundation for further study on the influence of defects on the mechanical properties of cast steel joints.
4 Conclusions
1)The outer surface defects of cast steel joints can be preliminarily detected by visual inspection.Only two defects, namely, shrinkage cavity and nonfusion, were found on the outer surface of 24 cast steel joints.Whether it is a simple or complex cast steel joint, the occurrence probability of SDs on the casting surface is relatively low.The core support ND is a common defect in complex cast steel joints, which can be observed by visual inspection and will be removed and repaired before castings leave factories.
2)The magnetic particle detection method was used to detect the surface cracks of 13 complex cast steel joints.Crack defects were found in the intersection area of pipes and tubes of four cast steel joints, among which three cast steel joints had more than one crack defect on the surface.Therefore, the intersection area of the cast steel node is prone to casting crack defects, and this area is the blind area of the ultrasonic flaw detection of the cast steel node, to which should be paid sufficient attention.
3)The occurrence probability of pore defects on simple cast steel nodes is the largest, and the occurrence probability of UDs on complex cast steel nodes is the largest.Taking 24 cast steel nodes as an overall sample, the occurrence probability of pore defects is 45.8%.The occurrence probability of UDs is 41.7%.Therefore, pore defects are the most common type of defects in cast steel joints.
[1] Pu D Q.Research on reasonable setting strategies and methods of structural safety level[D].Beijing: Tsinghua University, 2005.(in Chinese)
[2] Hong L X, Li H C, Peng K.A combined radial basis function and adaptive sequential sampling method for structural reliability analysis[J].Applied Mathematical Modelling, 2021, 90: 375-393.DOI: 10.1016/j.apm.2020.08.042.
[3] Hong L X, Li H C, Peng K, et al.A novel kriging based active learning method for structural reliability analysis[J].Journal of Mechanical Science and Technology, 2020, 34(4): 1545-1556.DOI: 10.1007/s12206-020-0317-y.
[4] Department of Civil Engineering and Architectural Engineering, Chinese Academy of Engineering.The development status and frontiers of civil engineering[M].Beijing: China Communication Press, 2012: 75-96.(in Chinese)
[5] Cheng J M, Jin H.An adaptive extreme learning machine based on an active learning method for structural reliability analysis[J].Journal of the Brazilian Society of Mechanical Sciences and Engineering, 2021, 43(12): 1-19.DOI: 10.1007/s40430-021-03257-1.
[6] Liu X L.Present situation and prospect of structural engineering discipline[M].Beijing: China Communication Press, 1996: 56-68.(in Chinese)
[7] Hong L X, Li H, Gao N, et al.Random and multi-super-ellipsoidal variables hybrid reliability analysis based on a novel active learning Kriging model[J].Computer Methods in Applied Mechanics and Engineering, 2021, 373: 113555.DOI: 10.1016/j.cma.2020.113555.
[8] Wei Z Z, Pei X J, Jin H.Evaluation of welded cast steel joint fatigue data using structural stress methods[J].Journal of Constructional Steel Research, 2021, 186: 106895.DOI: 10.1016/j.jcsr.2021.106895.
[9] Wei, Z Z, Pei X J, Jin H.A simplified approach to estimate the fatigue life of full-scale welded cast steel thin-walled tubular structures[J].Thin-Walled Structures, 2021, 160: 107348.DOI: 10.1016/j.tws.2020.107348.
[10] Wei Z Z, Jin H, Chen G L.Traction structural stress analysis of fatigue behaviors of girth butt weld within welded cast steel joints[J].International Journal of Pressure Vessels and Piping, 2020, 179: 104027.DOI: 10.1016/j.ijpvp.2019.104027.
[11] Du W F, Sun Z F, Gao B Q.Finite element analysis of a cast-steel joint with three branches in tree-like structure[J].Journal of Building Structures, 2014, 35(S1): 89-93.DOI: 10.14006/j.jzjgxb.2014.s1.014.(in Chinese)
[12] Chen D.Fatigue analysis of butt welds of cast steel nodes based on hot-spot stress approach[D].Nanjing: Southeast University, 2014.(in Chinese)
[13] Blair M, Monroe R, Beckermann C, et al.Predicting the occurrence and effects of defects in castings[J].JOM, 2005, 57(5): 29-34.DOI: 10.1007/s11837-005-0092-3.
[14] Doebling S W, Farrar C R, Prime M B, et al.Damage identification and health monitoring of structural and mechanical systems from change in their vibration characteristics: A literature review[R].Los Alamos, NM, USA: Los Alamos National Laboratory, 1996.
[15] Cai J G, Feng J, Gu H B, et al.Practical application and analysis of complex cast-steel joint[J].Steel Construction, 2008, 23(4): 13-17.(in Chinese)
[16] General Administration of Quality Supervision, Inspection and Quarantine of the People’s Republic of China, Standardization Administration of the People’s Republic of China.Steel castings—ultrasonic examination—part1: Steel castings for general purposes: GB/T 7233.1—2009[S].Beijing: Standards Press of China, 2009.(in Chinese)
[17] General Administration of Quality Supervision, Inspection and Quarantine of the People’s Republic of China, Standardization Administration of the People’s Republic of China.Foundry terminology: GB/T 5611—2017[S].Beijing: Standards Press of China, 2017.(in Chinese)
[18] Foundry Branch of China Mechanical Engineering Society.Foundry handbook: Cast steel[M].Beijing: China Machine Press, 2012: 34-69.(in Chinese)
[19] Yu J M, Xue X Q, Jin G M.Guide for the production of steel castings[M].Beijing: Chemical Industry Press, 2008: 72-89.(in Chinese)
[20] Ministry of Housing and Urban-rural Development of the People’s Republic of China.Technical specification for cast steel structure: JGJ/T 395—2017[S].Beijing: China Architecture and Building Press, 2017.(in Chinese)
[21] Inspection and Quarantine of the People’s Republic of China, Standardization Administration of the People’s Republic of China.Magnetic particle testing for steel castings: GB/T 9444—2007[S].Beijing: Standards Press of China, 2007.(in Chinese)
[22] State Bureau of Machine-Building Industry.Commonly used specification for A-mode ultrasonic flaw detector using pulse echo technique: JB/T 10061—1999[S].Beijing: Standards Press of China, 1999.(in Chinese)